This post is automatically translated from the Chinese version with LLM. The translation content has been edited and verified by the author.
Yes, you read that right. Without the need for Faraday cages or signal-blocking measures, you can build a legal LTE network at home (in the US) for around $100, capable of transmitting continuously 24/7.
Regarding "legal": I am not a lawyer or a wireless expert. Based on my research into the relevant policies and regulations, my entire setup should be legal. However, I take no responsibility if you encounter any legal issues after following the instructions in this post.
CBRS Band: Unlicensed LTE/5G Band in the US
The challenge in building your own LTE network lies not in the technology but in legally acquiring radio spectrum resources. On the software side, as early as 2014, solutions like srsRAN based on SDR (Software Defined Radio) for LTE transmission were available, along with open-source core network software like Magma and Open5GS.
However, when it comes to radio spectrum, the frequencies used by LTE and 5G mobile networks fall within licensed bands. To use them legally, you must apply to the local radio regulatory authority and pay expensive spectrum usage fees (usually based on coverage area and local population). Unless you live in a sparsely populated area, most enthusiasts will be stopped at this step. If you transmit without authorization, you will interfere with operators using the same frequency, and the affected operators have a strong incentive to collaborate with enforcement agencies to locate the source of interference and heavily fine you.
In 2017, however, the Federal Communications Commission (FCC) opened the 3550-3700 MHz band to the public, known as the CBRS (Citizens Broadband Radio Service) band. Anyone who meets simple restrictions can transmit on this band without prior authorization. Since this band corresponds to LTE band 48 and 5G band n48, you can transmit LTE or 5G signals on this band, allowing phones that support band 48 to connect, thereby legally establishing your own LTE/5G network.
If many devices transmit on the same band without coordination, severe signal interference will occur, rendering the band unusable for everyone. To address this, CBRS introduced the SAS system (Spectrum Access System) to manage all radio devices transmitting on the CBRS band. SAS categorizes CBRS users into three levels:
- Incumbent Access: Users who were authorized to use this band before 2017 have the highest priority. These are typically satellite control stations and US Navy radars. If these users transmit on the CBRS band, all other users must yield.
- Priority Access: Users who have obtained priority usage rights for portions of the CBRS band through auctions have a lower priority than incumbent users but higher than all other users.
- General Authorized Access: All other users without prior authorization have the lowest priority and must yield to all other users.
All CBRS band users, except the US Navy, must obtain authorization from SAS before starting transmission, allowing SAS to dynamically adjust frequency allocations in different areas to prevent mutual interference. For interference from US Navy radars, SAS uses signal receivers installed along the US coast to determine if the US Navy is using the band.
Therefore, with a LTE/5G base station that supports the CBRS band and can connect to SAS to obtain frequency allocations, you can legally transmit signals and build your own mobile network.
But where can you buy such a device?
Buying a Used Base Station on eBay
After the CBRS band was opened, it attracted the interest of many companies. As of today, 95 companies have joined the CBRS Alliance, including the big three US operators AT&T, T-Mobile, and Verizon, SAS system operators Google and Federated Wireless, and base station equipment manufacturers Baicells and Sercomm, among others.
Another company called Nova Labs was also interested in CBRS. Nova Labs operates a virtual network operator (MVNO) called Helium Mobile, providing services through T-Mobile's mobile network. To achieve lower costs and lower plan prices than other virtual operators, they:
- Sold Wi-Fi hotspots and CBRS base stations dedicated to the Helium Mobile network, allowing users to share their existing broadband connection.
- Prioritized Helium Mobile users to use these Wi-Fi hotspots and CBRS base stations, bypassing T-Mobile to reduce data traffic costs.
- Issued a digital currency called HNT, and used HNT to pay for traffic cost on Wi-Fi hotspots and CBRS base stations.
However, Nova Labs could never solve the stability issues of roaming to CBRS base stations and eventually abandoned the CBRS network entirely in March 2025, fully transitioning to using Wi-Fi hotspots. The CBRS base stations, originally costing thousands of dollars, were replaced and now listed on eBay for around $60 each. After flashing back to the original firmware and unlocking the management interface, these base stations can connect to core networks built with Magma, Open5GS, etc., and transmit for your own LTE network.
Search for "CBRS" on eBay to find many CBRS base stations from the Helium Mobile network.
Note that Helium Mobile sells two types of CBRS base stations:
- Indoor base stations produced by Sercomm, branded by FreedomFi or MosoLabs, model
SCE4255W, characterized by the FreedomFi or MosoLabs logo on the casing.
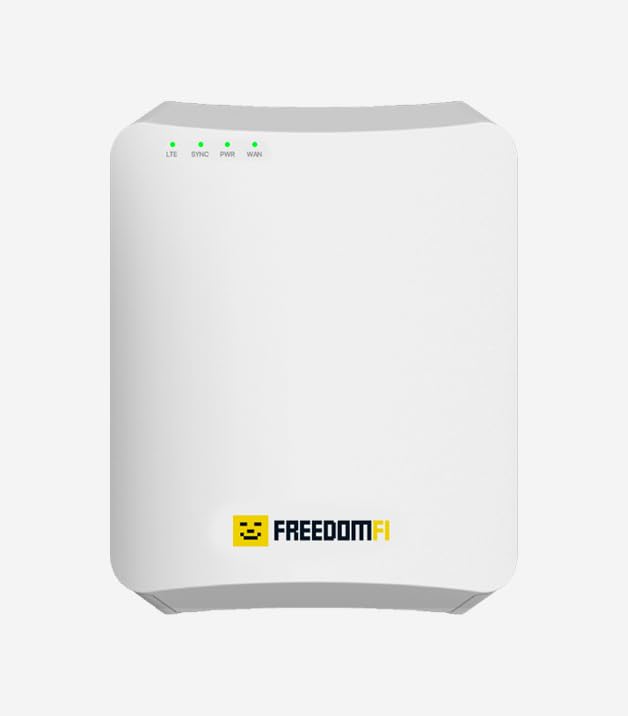
(Image source: Amazon)
- Outdoor base stations produced by Baicells, model
Nova 430h, characterized by the orange Baicells logo on the casing.
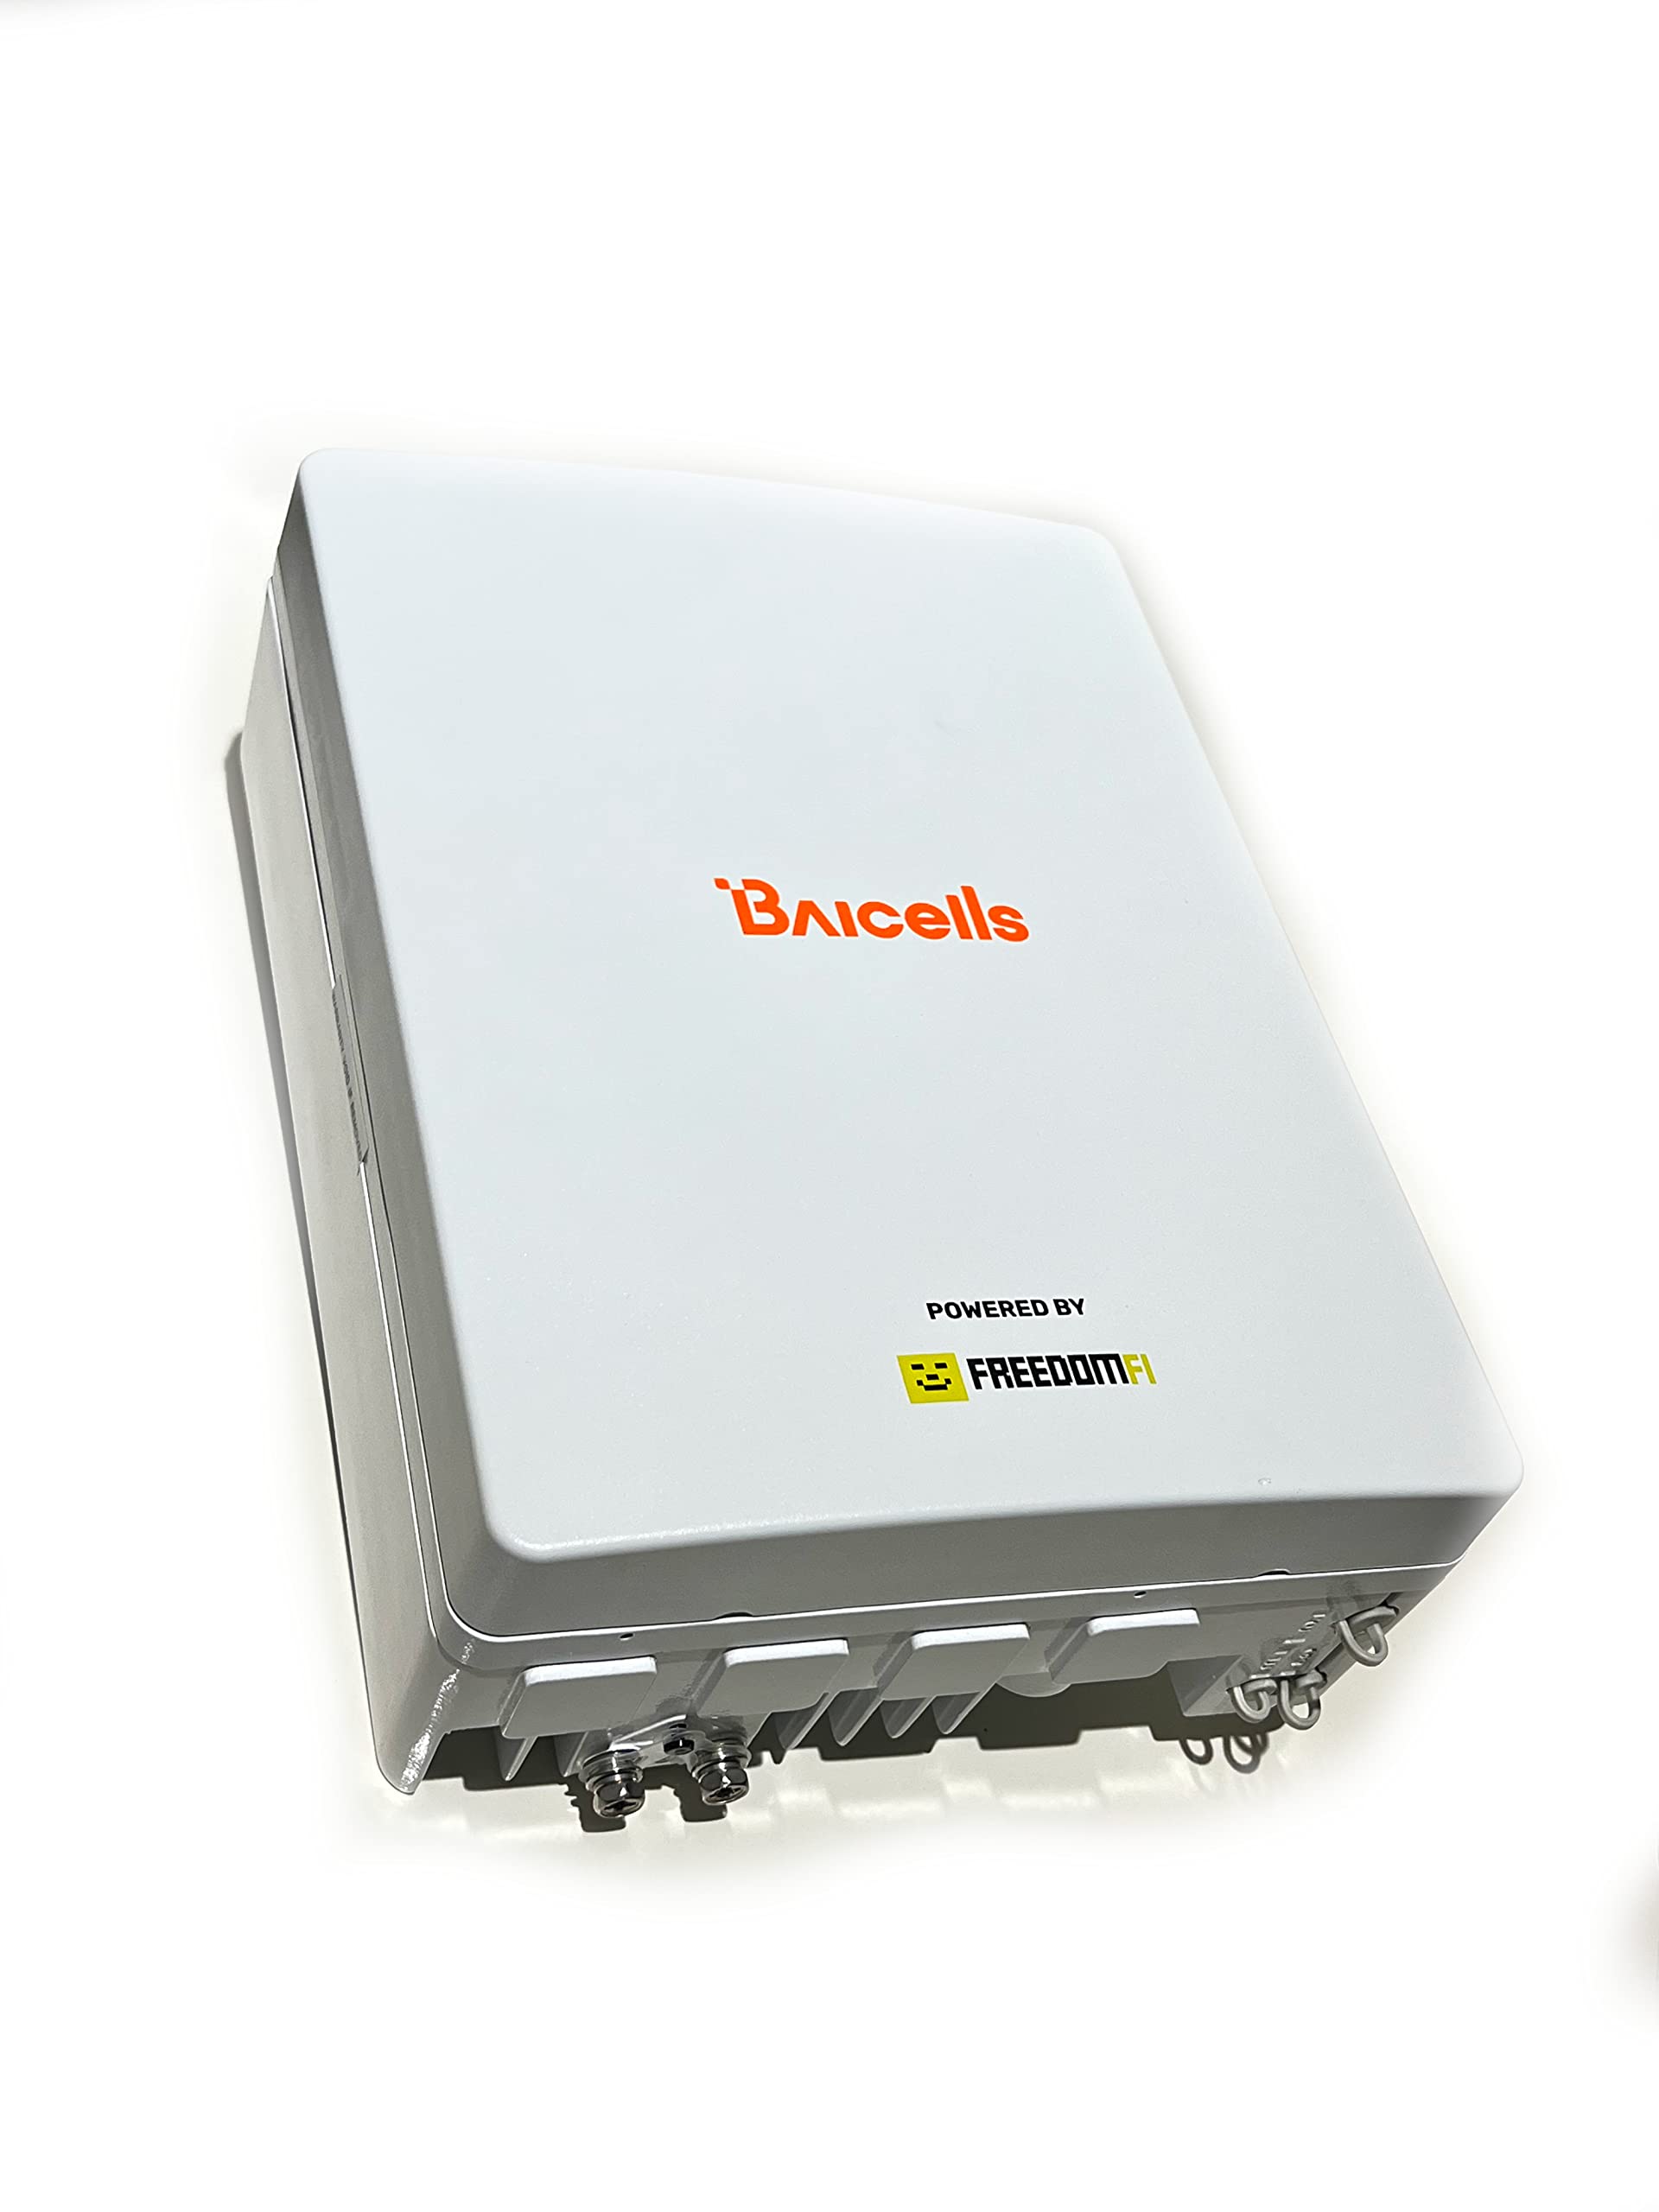
(Image source: Amazon)
If you are deploying at home, you must buy an indoor base station, not an outdoor one. The differences between the two are:
- Indoor base stations can only be used indoors. They can easily connect to SAS without additional steps.
- Outdoor base stations can only be used outdoors. They have higher SAS authorization fees, and require a CBRS Alliance-authorized installer to check the installation before transmission can begin. If you want to install an outdoor base station but can't find an authorized installer, you can also spend $600 to get certified as an authorized installer, valid for 3 years, and then you can approve your own base stations and install as many base stations as you want.
I didn't want to spend $600 on a certification that has little other use, so I bought an indoor base station directly.
Unlocking the Management Interface of the Indoor Base Station
When you buy a FreedomFi/Sercomm SCE4255W indoor base station from eBay, plug it in and turn it on, you'll find you can't connect to the base station's web management interface to change its configuration. This was done to prevent base station owners from messing with the settings, which could affect network stability, but it also prevents us from using the base station elsewhere.
However, these base stations connect to a central server to get configurations via the HTTP-based TR-069 protocol, a term you might be familiar with if you've ever modified your model or router provided by ISP. We can hijack the default control server address to our own control server, allowing us to freely modify the base station's configuration.
If you plan to use Magma to build your core network, you can skip this step. Magma comes with a TR-069 server that can send configurations to the base station, and engineers from Helium Mobile and FreedomFi have already added support for this base station to Magma, so we can later hijack the base station's control server acs.freedomfi.com to Magma via DNS.
If you plan to use Open5GS or other software that doesn't support TR-069 to build your core network, you can use my script to simulate a TR-069 server and send the command to enable the web management interface to the base station:
- Download the
tr069.pyscript from https://github.com/xddxdd/freedomfi-cbrs-enable-webui. - Install Python 3, then run
python3 tr069.py. - Modify your router's DNS settings to hijack the IP of
acs.freedomfi.comto the IP of the computer running thetr069.pyscript. My router uses OpenWRT, so I can add a rule in the Dnsmasq configuration page:/acs.freedomfi.com/192.168.4.2. - Unbox the base station, connect it with an Ethernet cable, and plug in the power.
- Wait a moment, and you should see a large amount of XML output in the window running the
tr069.pyscript, which are the commands sent by the base station to the server. If you aren't receiving any requests, check if the DNS configuration is correct and if there's a firewall on your computer blocking port 8443. - When you see output containing
cwmp:SetParameterValuesResponse, it means the web management interface has been successfully enabled. The complete output should look like this:
<soap-env:Envelope xmlns:soap-env="http://schemas.xmlsoap.org/soap/envelope/" xmlns:soap-enc="http://schemas.xmlsoap.org/soap/encoding/" xmlns:xsd="http://www.w3.org/2001/XMLSchema" xmlns:xsi="http://www.w3.org/2001/XMLSchema-instance" xmlns:cwmp="urn:dslforum-org:cwmp-1-0">
  <soap-env:Header>
    <cwmp:ID soap-env:mustUnderstand="1">null</cwmp:ID>
  </soap-env:Header>
  <soap-env:Body>
    <cwmp:SetParameterValuesResponse>
      <Status xsi:type="xsd:int">0</Status>
    </cwmp:SetParameterValuesResponse>
  </soap-env:Body>
</soap-env:Envelope>
After enabling the management interface, you can access the base station's management interface via HTTPS, like https://192.168.1.123/.
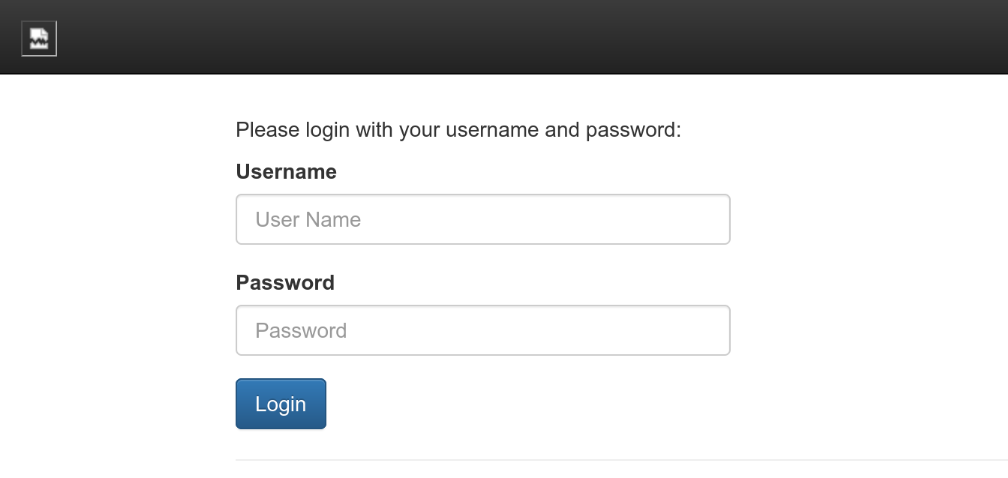
The default username and password are sc_femto and tsFid2wz (from Helium Mobile's Discord: link).
Purchasing Programmable SIM Cards
After building your LTE network, you'll need some SIM cards with your network's configuration programmed on them to allow phones to connect to your network. Since the information on regular SIM cards is hardcoded during production, you can't just buy any SIM card; you must use programmable SIM cards.
Search for Programmable SIM on shopping websites like Amazon and Aliexpress to find these cards, for example: https://www.amazon.com/s?k=Programmable+SIM.

(Image source: Amazon)
I bought a set of SIM cards on Amazon for $38.99, which included 5 programmable SIM cards, a card writer, a USB drive with Windows card-programming software, and an adapter from Micro SIM/Nano SIM to full-size SIM.
Building a Magma Core Network
To build your own LTE network, you first need a core network. The LTE core network mainly manages user device (e.g., phone) authentication information and controls billing, traffic throttling, and other functions.
Magma is an open-source 4G/5G core network developed by Meta (Facebook), running on Docker/Kubernetes. It can quickly scale horizontally to support large amounts of mobile network traffic and can run on low-spec devices like Raspberry Pi to provide simple network services.
Since I don't need the complex container orchestration features of Kubernetes, I chose to build Magma's components using Docker.
I referenced the following materials during the configuration process:
- Core network (Orchestrator and NMS) part: [Study Note] How To Install Magma Core (Orchestrator)
- Core network (Orchestrator and NMS) part: How To Configure Magma Orchestrator & NMS - RakWireless
- Access Gateway part: Install Docker-based Access Gateway on Ubuntu - Magma
Building the Magma Core Network (Orchestrator and NMS)
First, prepare a system to run the core network. I chose to create a virtual machine on Proxmox VE. After installation, the system services and Magma together use about 4GB of memory, so a virtual machine with about 8GB of memory should be sufficient.
I installed Ubuntu 24.04, but other systems should theoretically work as well.
Then, install Docker and Docker-compose.
Then, execute the following operations:
# All commands below assume you are staring from the HOME directory
cd ~

# Download Magma v1.8.0 source code; you can replace the version number if there's an update
git clone https://github.com/magma/magma.git
cd magma
git checkout v1.8.0

# Generate SSL certificates for the core network
mkdir -p ~/secrets/certs
cd ~/secrets/certs
# Here, magma.test can be replaced with your own domain or subdomain,
# but since we're generating self-signed certificates, the domain cannot have HSTS enabled
bash ~/magma/orc8r/cloud/deploy/scripts/self_sign_certs.sh magma.test
bash ~/magma/orc8r/cloud/deploy/scripts/create_application_certs.sh magma.test
# Copy the SSL certificates to the configuration needed by the Magma Docker containers
mkdir -p ~/magma/.cache/test_certs/
cp -r * ~/magma/.cache/test_certs/
chmod -R +r ~/magma/.cache/test_certs/

# Build the Docker containers for the Orchestrator component
cd ~/magma/orc8r/cloud/docker
python3 build.py --all
# Wait for the Docker image build to complete, which takes about 30 minutes

# Modify the configuration in docker-compose.yml
nano docker-compose.yml
# Items to modify:
# - If you used a different domain when generating SSL certificates, search for magma.test and replace it with your own domain
# - Add `restart: always` to the `kibana` and `fluentd` containers for auto-start on boot

# Start the Orchestrator
python3 run.py

# Confirm all containers have started successfully
docker ps -a
# All containers except orc8r-test should be in the Up state
# If any container fails to start, use `docker logs [container name]` to view logs and resolve issues accordingly

# Modify the DNS server configuration to point magma.test (or your own domain) and all subdomains to this machine's IP
# For example, my Dnsmasq rule is: /magma.test/192.168.0.7

# Prepare to build the Web management interface (NMS)
cd ~/magma/nms

# Modify the configuration in docker-compose.yml
nano docker-compose.yml
# Items to modify:
# - Add `restart: always` to all containers for auto-start on boot

# Modify a configuration in docker/docker_ssl_proxy/proxy_ssl.conf that is no longer supported by the new version of nginx
nano docker/docker_ssl_proxy/proxy_ssl.conf
# Delete the lines `listen 443;` and `ssl on;`, replace with `listen 443 ssl;`

# Start the Docker containers for the Web management interface
docker-compose up -d
# Wait for the Docker image build to complete, which takes about 20 minutes

# Confirm all containers have started successfully
docker ps -a
# All containers starting with nms should be in Up state
# If any container fails to start, use `docker logs [container name]` to view logs and resolve issues accordingly

# Create the default administrator
bash scripts/dev_setup.sh
Then, in your local browser, visit https://magma-test.magma.test (or magma-test.[your own domain]), and you should see the login interface. If you see an address not found error, confirm that the domain is resolving correctly.
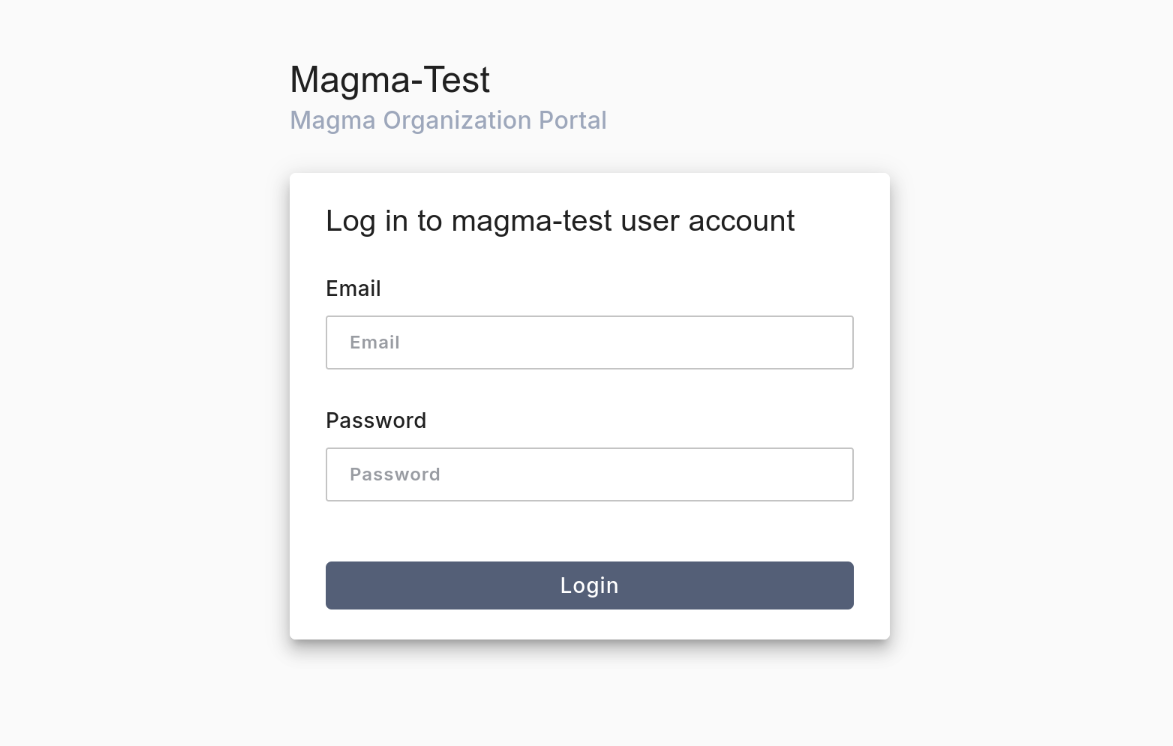
Log in with the default username admin@magma.test and password password1234.
In the left Network tab, add a network and fill in the following:
- In the
Configtab,Network IDandNetwork Namecan be filled in arbitrarily.
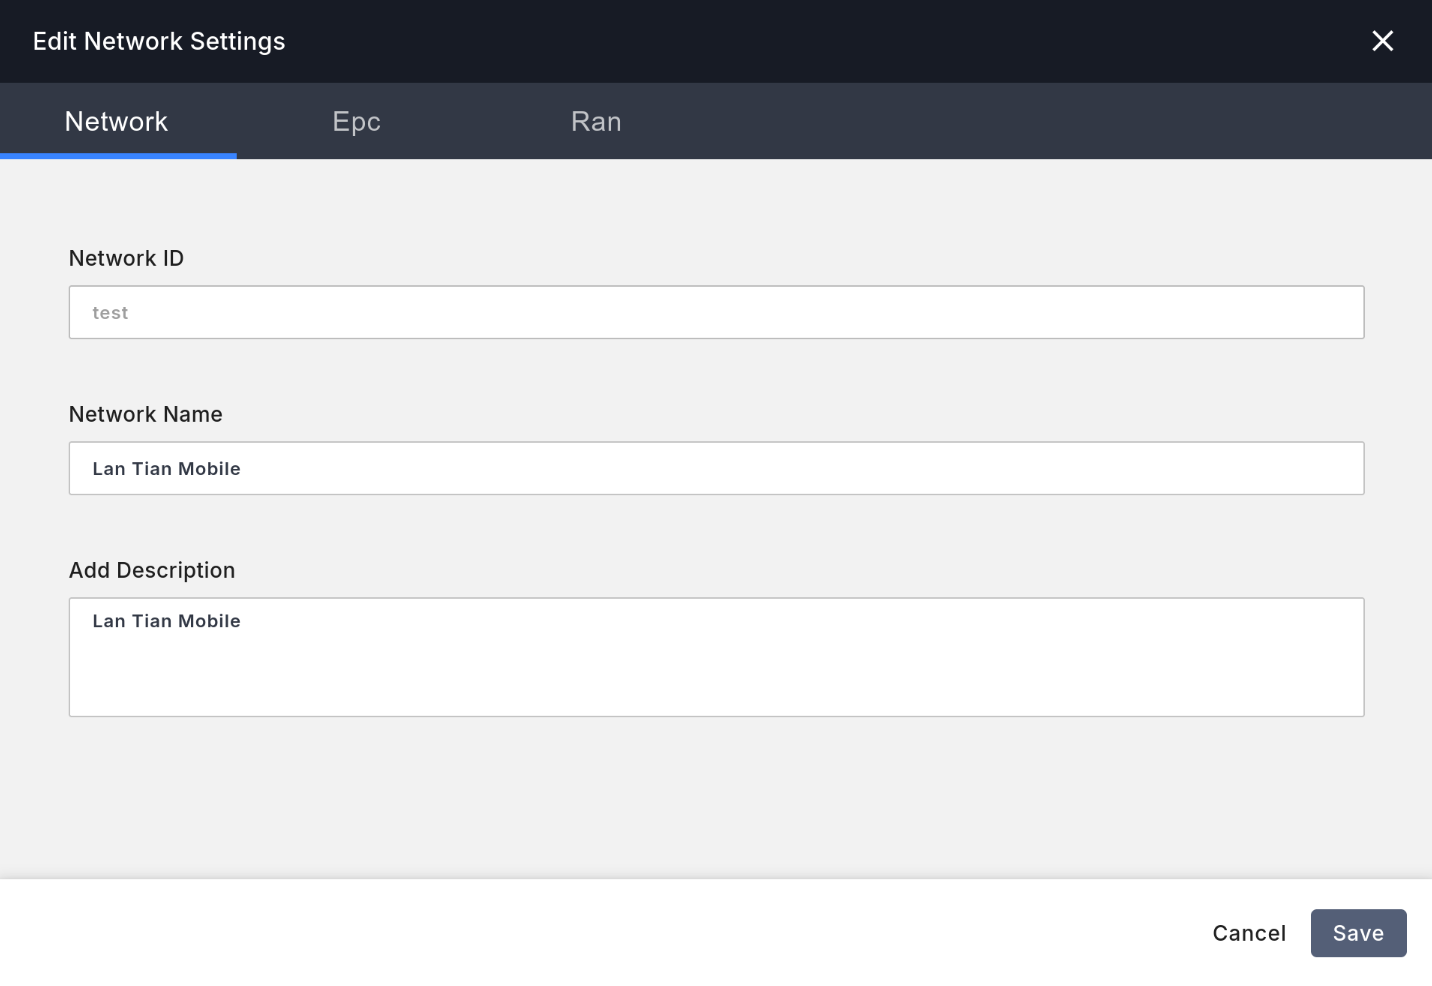
- In the
Epctab, change MCC to315, MNC to010, and TAC to1. MCC/MNC are the codes for mobile operators, for example, AT&T's MCC/MNC is310/410, and T-Mobile's is310/260.315/010is the code specifically allocated for CBRS networks, and all mobile networks on the CBRS band can use it.
- In the
Rantab, changeBandwidthto 20 MHz for the fastest speed. SelectBand TypeasTDDbecause the LTE 48/5G n48 band uses TDD time-division multiplexing. - Fill in EARFCNDL with
55540, which represents the 3580 MHz frequency point within the CBRS band, but the CBRS base station will actually use the frequency allocated by SAS, not the one specified here. - Keep all other configurations at their defaults.

After completing the above configuration, you now have an LTE core network. However, your base station cannot directly connect to the core network; it needs another component: the Access Gateway (AGW).
Building the Magma Access Gateway (AGW)
Magma's Access Gateway manages the base station and forwards the base station's data traffic to the internet. Note that Magma's core network only manages user information and does not handle data traffic, and the traffic from the Access Gateway does not pass through the core network.
First, prepare a system to run the Access Gateway. This system needs to be configured with two network interfaces, where eth0 is used for remote management and connecting to the core network, and eth1 is used for connecting to the base station. If you're using a separate computer, you'll need to plug the base station's Ethernet cable into the eth1 interface later, and Magma will automatically configure DHCP to allow the base station to connect to the Access Gateway. However, since I'm using a virtual machine on Proxmox VE, I chose to place the additional eth1 interface in a VLAN and set up the corresponding VLAN and IP on the main router. This way, I can ping the eth1 IP from any machine on my local network, meaning the base station can be plugged into any port on my main switch.
This system must be installed with Ubuntu 20.04 because the Magma Access Gateway installation modifies many system configurations, and these modifications are only supported on Ubuntu 20.04.
After installation, the system services and Magma together use about 1GB of memory, so a virtual machine with about 2-4GB of memory should be sufficient.
Then, install Docker and Docker-compose.
Then, execute the following operations:
# Copy the rootCA.pem from the core network to the Access Gateway
# On the access gateway machine, run:
mkdir -p /var/opt/magma/certs
# On your local computer, run:
scp root@[core network machine]:~/magma/.cache/test_certs/rootCA.pem .
scp rootCA.pem root@[Access Gateway machine]:/var/opt/magma/certs/rootCA.pem

# Create the configuration file for connecting to the core network, on the access gateway machine:
# If your core network domain is not magma.test, replace accordingly
cat << EOF | sudo tee /var/opt/magma/configs/control_proxy.yml
cloud_address: controller.magma.test
cloud_port: 7443
bootstrap_address: bootstrapper-controller.magma.test
bootstrap_port: 7444
fluentd_address: fluentd.magma.test
fluentd_port: 24224

rootca_cert: /var/opt/magma/certs/rootCA.pem
EOF

# Run the one-click installation script, on the access gateway machine:
wget https://github.com/magma/magma/raw/v1.8/lte/gateway/deploy/agw_install_docker.sh
bash agw_install_docker.sh
# The first installation attempt will likely fail, due to the expiration of Magma's official GPG certificate. Below is how to resolve this issue.
# Solution from https://github.com/magma/magma/issues/15572

# Disable apt-get GPG verification
echo "Acquire::AllowInsecureRepositories true;" > /etc/apt/apt.conf.d/99AllowInsecureRepositories
echo "APT::Get::AllowUnauthenticated true;" >> /etc/apt/apt.conf.d/99AllowInsecureRepositories
apt update

# Remove the problematic steps
nano /opt/magma/lte/gateway/deploy/roles/magma_deploy/tasks/main.yml
# Delete the steps `Add unvalidated Apt signing key.` and `Add validated Apt signing key.`

# Modify the installation script to skip already executed parts
nano agw_install_docker.sh
# Change `RERUN=0` to `RERUN=1` to skip already executed parts

# Rerun the installation script
bash agw_install_docker.sh

# If successful, the installation should complete. Reboot the machine
reboot

# Modify the IP address configuration for the eth1 interface as needed
cat << EOF | sudo tee /etc/netplan/70-secondary-itf.yaml
network:
  ethernets:
    eth1:
      addresses:
      - 192.168.4.2/24
      routes:
      - to: 0.0.0.0/0
        via: 192.168.4.1
        metric: 1000
      nameservers:
        addresses:
        - 192.168.4.1
        search: []
  version: 2
EOF
netplan apply

# Confirm all containers have started successfully
docker ps -a
# All containers except liagentd should be in Up state
# If any container fails to start, use `docker logs [container name]` to view logs and resolve issues accordingly

# Get the Access Gateway's key, which will be needed later to connect to the core network
docker exec magmad show_gateway_info.py
Return to the core network management interface at https://magma-test.magma.test (or magma-test.[your own domain]), go to the left Equipment tab, and ensure the network you created earlier is selected in the top right corner.
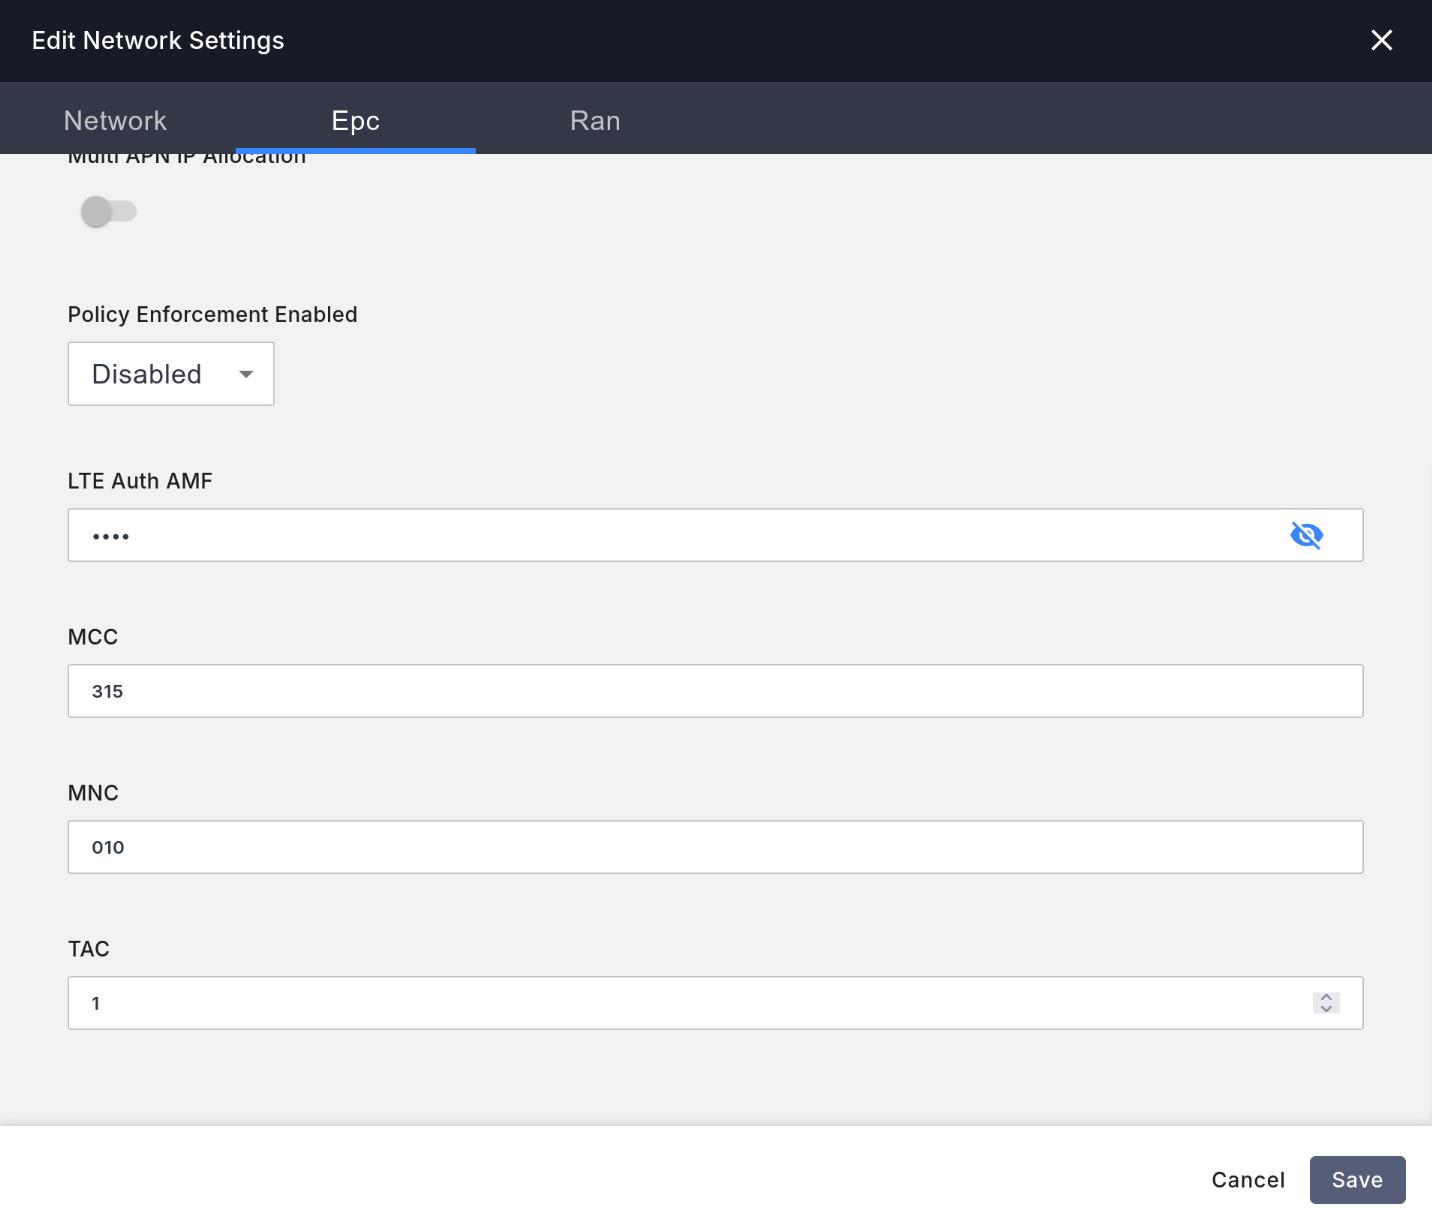
Click the Add New button in the top right to add the Access Gateway, and fill in the following:
- In the
Configtab,Gateway NameandGateway IDcan be filled in arbitrarily. - In the
Configtab, fill inHardware UUIDwith theHardware IDyou obtained from the Access Gateway. - In the
Configtab, fill inChallenge Keywith theChallenge keyyou obtained from the Access Gateway. - Keep all other configurations at their defaults.
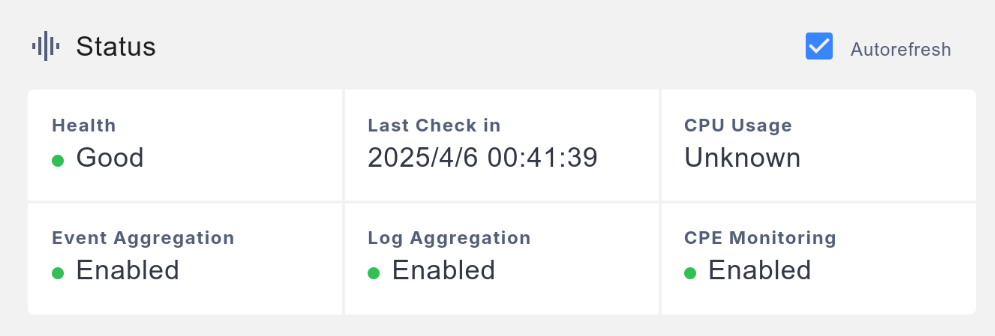
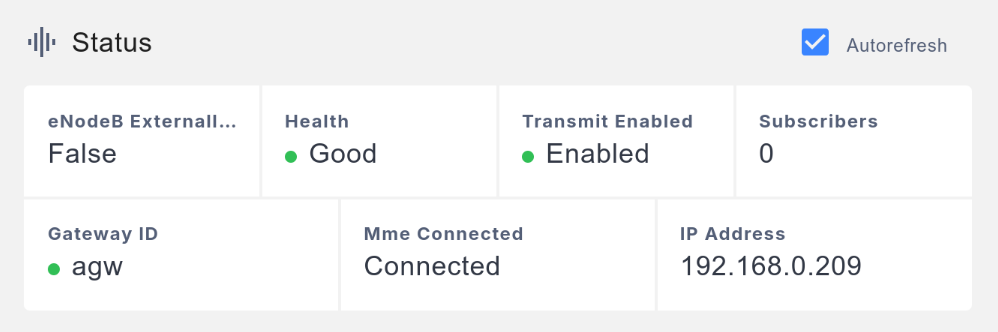
After saving, wait a moment, and the management interface should show the status of this Access Gateway as Health being Good. If the status remains Bad, try rebooting the Access Gateway or check the DNS on the Access Gateway to ensure magma.test (or your domain) points to the core network.
Connecting the Base Station to the Magma Access Gateway
Pick up your CBRS base station and look at the label on the back, which should have a serial number like 2112CW5012345.
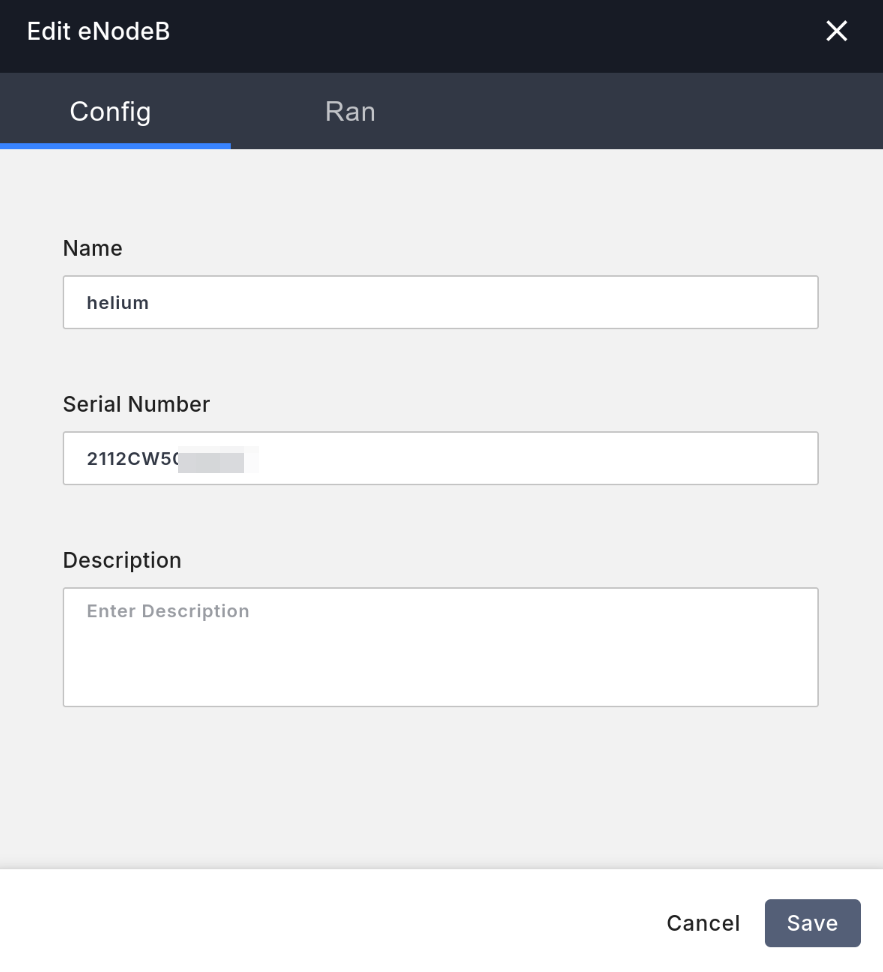
In the core network management interface, go to the left Equipment tab, then to the eNodeB tab. Click the Add New button in the top right to add the base station, and fill in the following:
- In the
Configtab,Namecan be filled in arbitrarily. - In the
Configtab, fill inSerial numberwith the serial number from the base station's label.
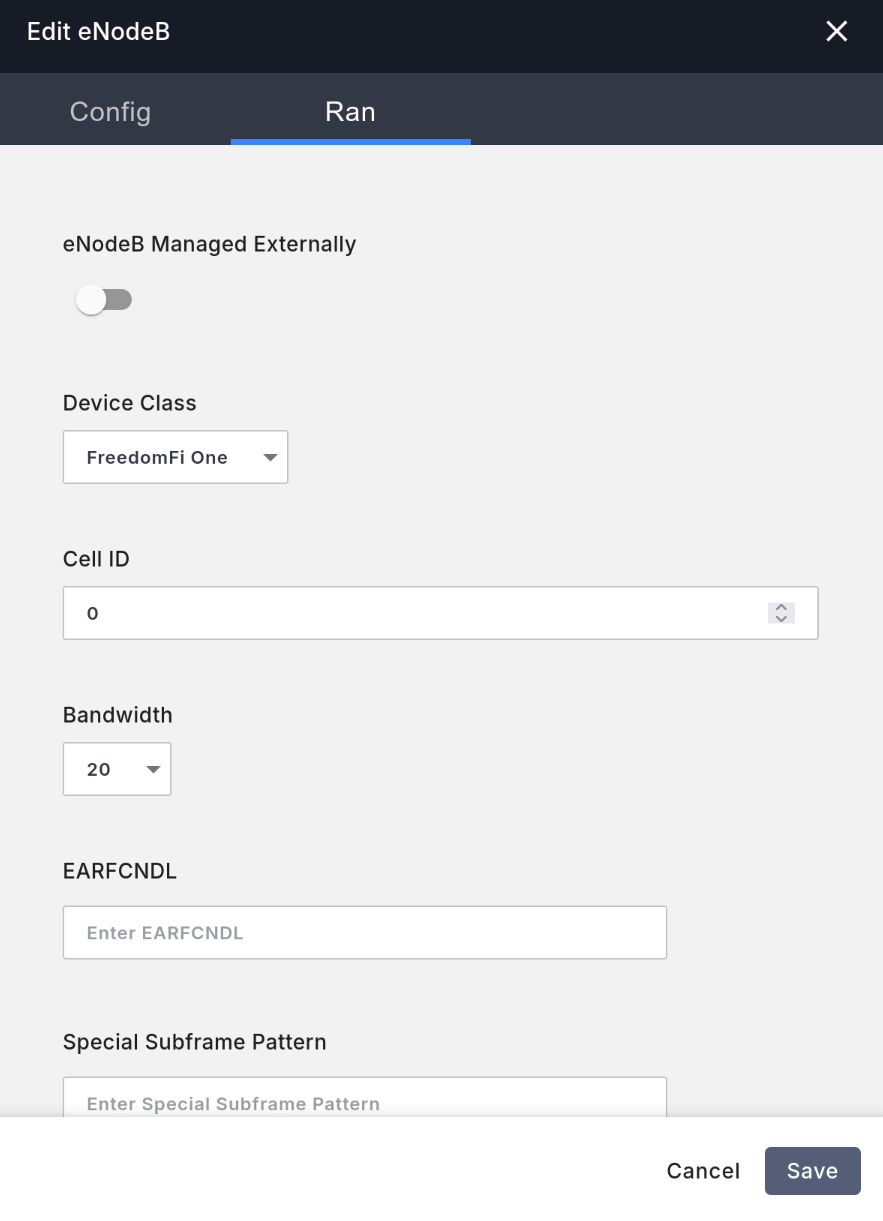
- In the
Rantab, do not selecteNodeB Managed Externally(disallow Magma from managing the base station). - In the
Rantab, selectDevice ClassasFreedomFi One(for FreedomFi/Sercomm's indoor base station). - In the
Rantab, fill inCell IDwith0(increment by one for each additional base station). - In the
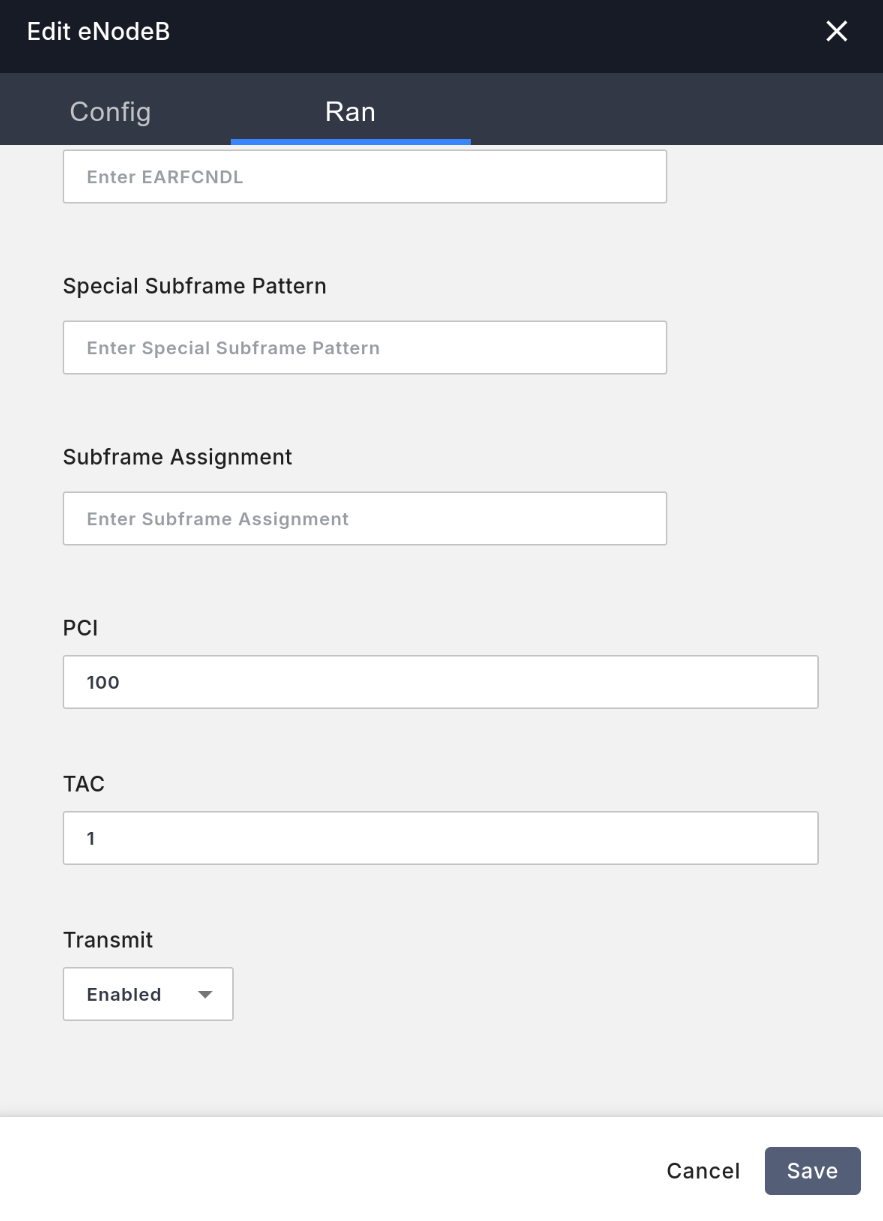
Rantab, selectBandwidthas 20 MHz for the fastest speed. - In the
Rantab, fill inPCIwith100(increment by one for each additional base station). - In the
Rantab, fill inTACwith1. - In the
Rantab, selectTransmitasEnabled(enable transmission).
Although we've added the base station to Magma, since the base station device defaults to connecting to Helium Mobile's server for configuration, it still can't connect to our Access Gateway properly. Therefore, we need to hijack the base station's control server acs.freedomfi.com to the eth1 IP address of Magma access gateway via DNS. Modify your router's DNS settings to hijack the IP of acs.freedomfi.com to the eth1 IP of the machine running the Access Gateway. My router uses OpenWRT, so I can add a rule in the Dnsmasq configuration page: /acs.freedomfi.com/192.168.4.2.
Additionally, because the port number of the TR-069 server on the Magma Access Gateway is different from Helium Mobile's, we need to modify the port number and some other configurations on the Access Gateway.
On the Access Gateway, edit nano /etc/magma/enodebd.yml and make the following changes:
# Change the port under tr069 to 8443 to match Helium Mobile's control server port number
tr069:
  port: 8443

# Modify the configuration for the base station to connect to the SAS server; this configuration corresponds to connecting to Google SAS
sas:
  # Let the base station connect to the SAS server directly, not through Magma proxy. Magma proxy SAS connection requires installing additional components, which is too complicated
  dp_mode: False
  # SAS server address, here for Google SAS
  sas_server_url: "https://sas.goog/v1.2/"
  # Your Google Cloud Project ID can be seen on the console homepage: https://console.cloud.google.com
  sas_uid: "[replace with your own Google Cloud Project ID]"
  # A represents indoor, B represents outdoor
  sas_category: "A"
  # GAA represents the lowest priority General Authorized Access
  sas_channel_type: "GAA"
  # indoor for indoor, outdoor for outdoor
  sas_location: "indoor"
  # Use this value for FreedomFi/Sercomm indoor base stations; it may be different for other brands
  sas_cert_subject: "/C=TW/O=Sercomm/OU=WInnForum CBSD Certificate/CN=P27-SCE4255W:%s"
  # Keep the following two items unchanged
  sas_icg_group_id: ""
  sas_height_type: "AMSL"

# Change the LTE synchronization source to FREE_RUNNING; otherwise, the indoor base station may not transmit signals if the GPS signal is too weak
prim_src: "FREE_RUNNING"

# Add your base station's serial number here to enable the web management interface
web_ui_enable_list: ["2112CW5012345"]

# Keep all other configurations unchanged
After saving the configuration file, reboot the entire Access Gateway system. I found during testing that restarting individual Docker containers on the Access Gateway can cause strange issues, such as the base station not being able to connect to the Access Gateway. A full reboot can resolve most strange issues.
Wait a moment, and the core network management interface should show the status of this base station as Health being Good. If the status remains Bad, try rebooting the Access Gateway.
If you added the indoor base station's serial number to web_ui_enable_list to enable the management interface, you can now access the base station's management interface via HTTPS, like https://192.168.1.123/. The default username and password are sc_femto and tsFid2wz (from Helium Mobile's Discord: link).
Connecting the Base Station to SAS
At this point, the base station is connected to your core network, but since it hasn't connected to the CBRS SAS system (Spectrum Access System) and obtained frequency authorization, it still won't transmit LTE signals.
We need to register an account with a SAS system and register our base station to obtain frequency authorization.
I used Google SAS, a SAS system run by Google Cloud. Google SAS is currently the easiest SAS system to register with; other vendors' SAS systems usually require contacting sales and signing enterprise-level service contracts to use. Moreover, Google SAS is extremely affordable; at the time of writing, the price for indoor base stations is $2.64 per month per unit, and for outdoor base stations, it's $13.15 per month per unit.
You need to register a Google Cloud account first, then visit the SAS configuration page in the console and follow these steps to configure:
- Determine your latitude and longitude. If you use an Android phone, you can download the GPS Status & Toolbox app from Google Play to view your latitude and longitude. If you use an iPhone, you can view your latitude and longitude from the built-in Compass app.
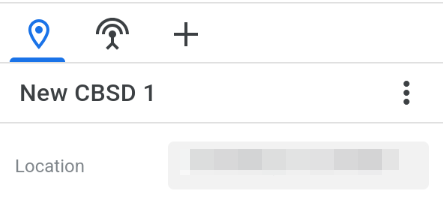
- In the console, select the "Add Site" button at the top (the one with a plus sign), and click anywhere on the map. A sidebar will pop up on the right, asking you to enter information about your base station.

- First, switch to the first tab on the right sidebar (Location) and enter your correct latitude and longitude. It doesn't need to be very precise; the base station itself will upload its GPS location.
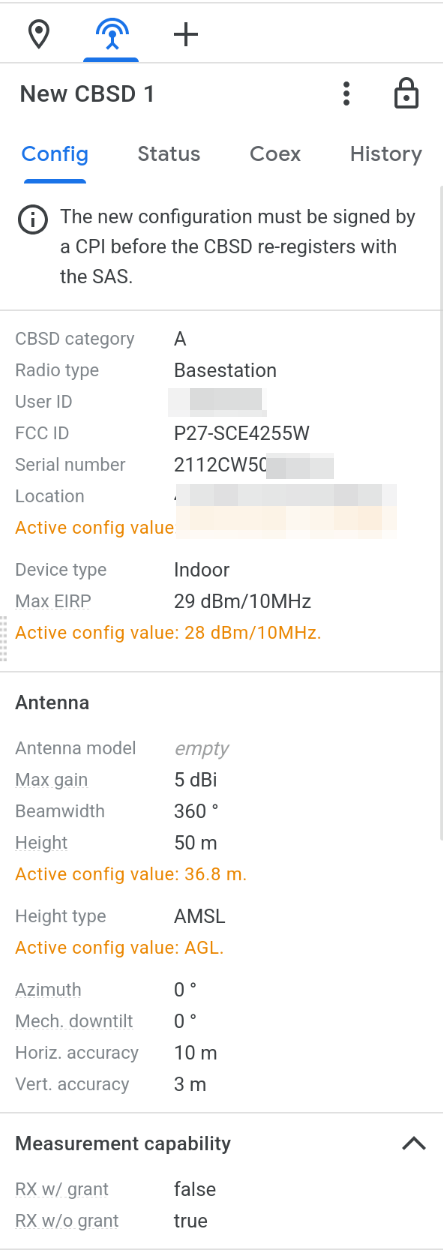
- Then, switch to the second tab (Base Station Information) and fill in the following:
CBSD categoryshould beAfor indoor base stations andBfor outdoor base stations, based on your actual situation.FCC IDshould be the FCC ID on the base station's label.Serial numbershould be the serial number on the base station's label.Device typeshould beIndoor(indoor) orOutdoor(outdoor), based on your actual situation.- Under
Air Interface, selectE_UTRA(corresponding to LTE) forRadio technology. - Under
Antenna, fill inHeightwith your GPS altitude. - Under
Antenna, selectHeight typeasAMSL(height referenced to sea level). - Under
Antenna, fill inAzimuthwith the compass direction the base station faces.- For FreedomFi/Sercomm indoor base stations, since the antenna transmits in 360 degrees, the direction doesn't matter, so you can directly enter
0.
- For FreedomFi/Sercomm indoor base stations, since the antenna transmits in 360 degrees, the direction doesn't matter, so you can directly enter
- Under
Antenna, fill inMech downtiltwith the degree of downward tilt of the base station; if there's no tilt, you can directly enter0. - Under
Antenna, fill inHoriz accuracywith10. - Under
Antenna, fill inVert accuracywith3.
- You also need to fill in the following based on the base station's data sheet. If you're using a FreedomFi/Sercomm indoor base station, you can directly copy my configuration:
Max EIRPshould be29for FreedomFi/Sercomm indoor base stations.- Under
Antenna,Max gainshould be5for FreedomFi/Sercomm indoor base stations. - Under
Antenna,Beamwidthshould be360for FreedomFi/Sercomm indoor base stations. - Under
Antenna,Azimuthshould be360for FreedomFi/Sercomm indoor base stations. - Under
Measurement capability, for FreedomFi/Sercomm indoor base stations, do not checkRX w/ grant, but checkRX w/o grant. - Under
Air Interface,Supported specshould beFFSfor FreedomFi/Sercomm indoor base stations.
- You can leave the rest of the configurations blank; click
Ready for CPI. - At this point, the page will display "The new configuration must be signed by a CPI before the CBSD registers with the SAS." (The base station needs to be approved by a Certified Professional Installer (CPI) before it can register with the SAS again). If you're installing an indoor base station, you can ignore this. But if you're installing an outdoor base station, you'll need to find a Certified Professional Installer to approve the configuration, or spend $600 to get certified as a CPI.
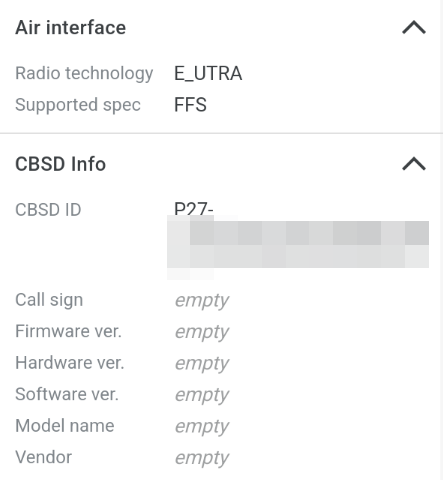
Reboot the base station: unplug the power from your base station, wait a few seconds, then plug it back in. After a few minutes, once the base station has started up and completed GPS positioning, the Google SAS configuration page should show some yellow-highlighted Active config value, indicating that these configurations differ from what you entered. You can ignore them.
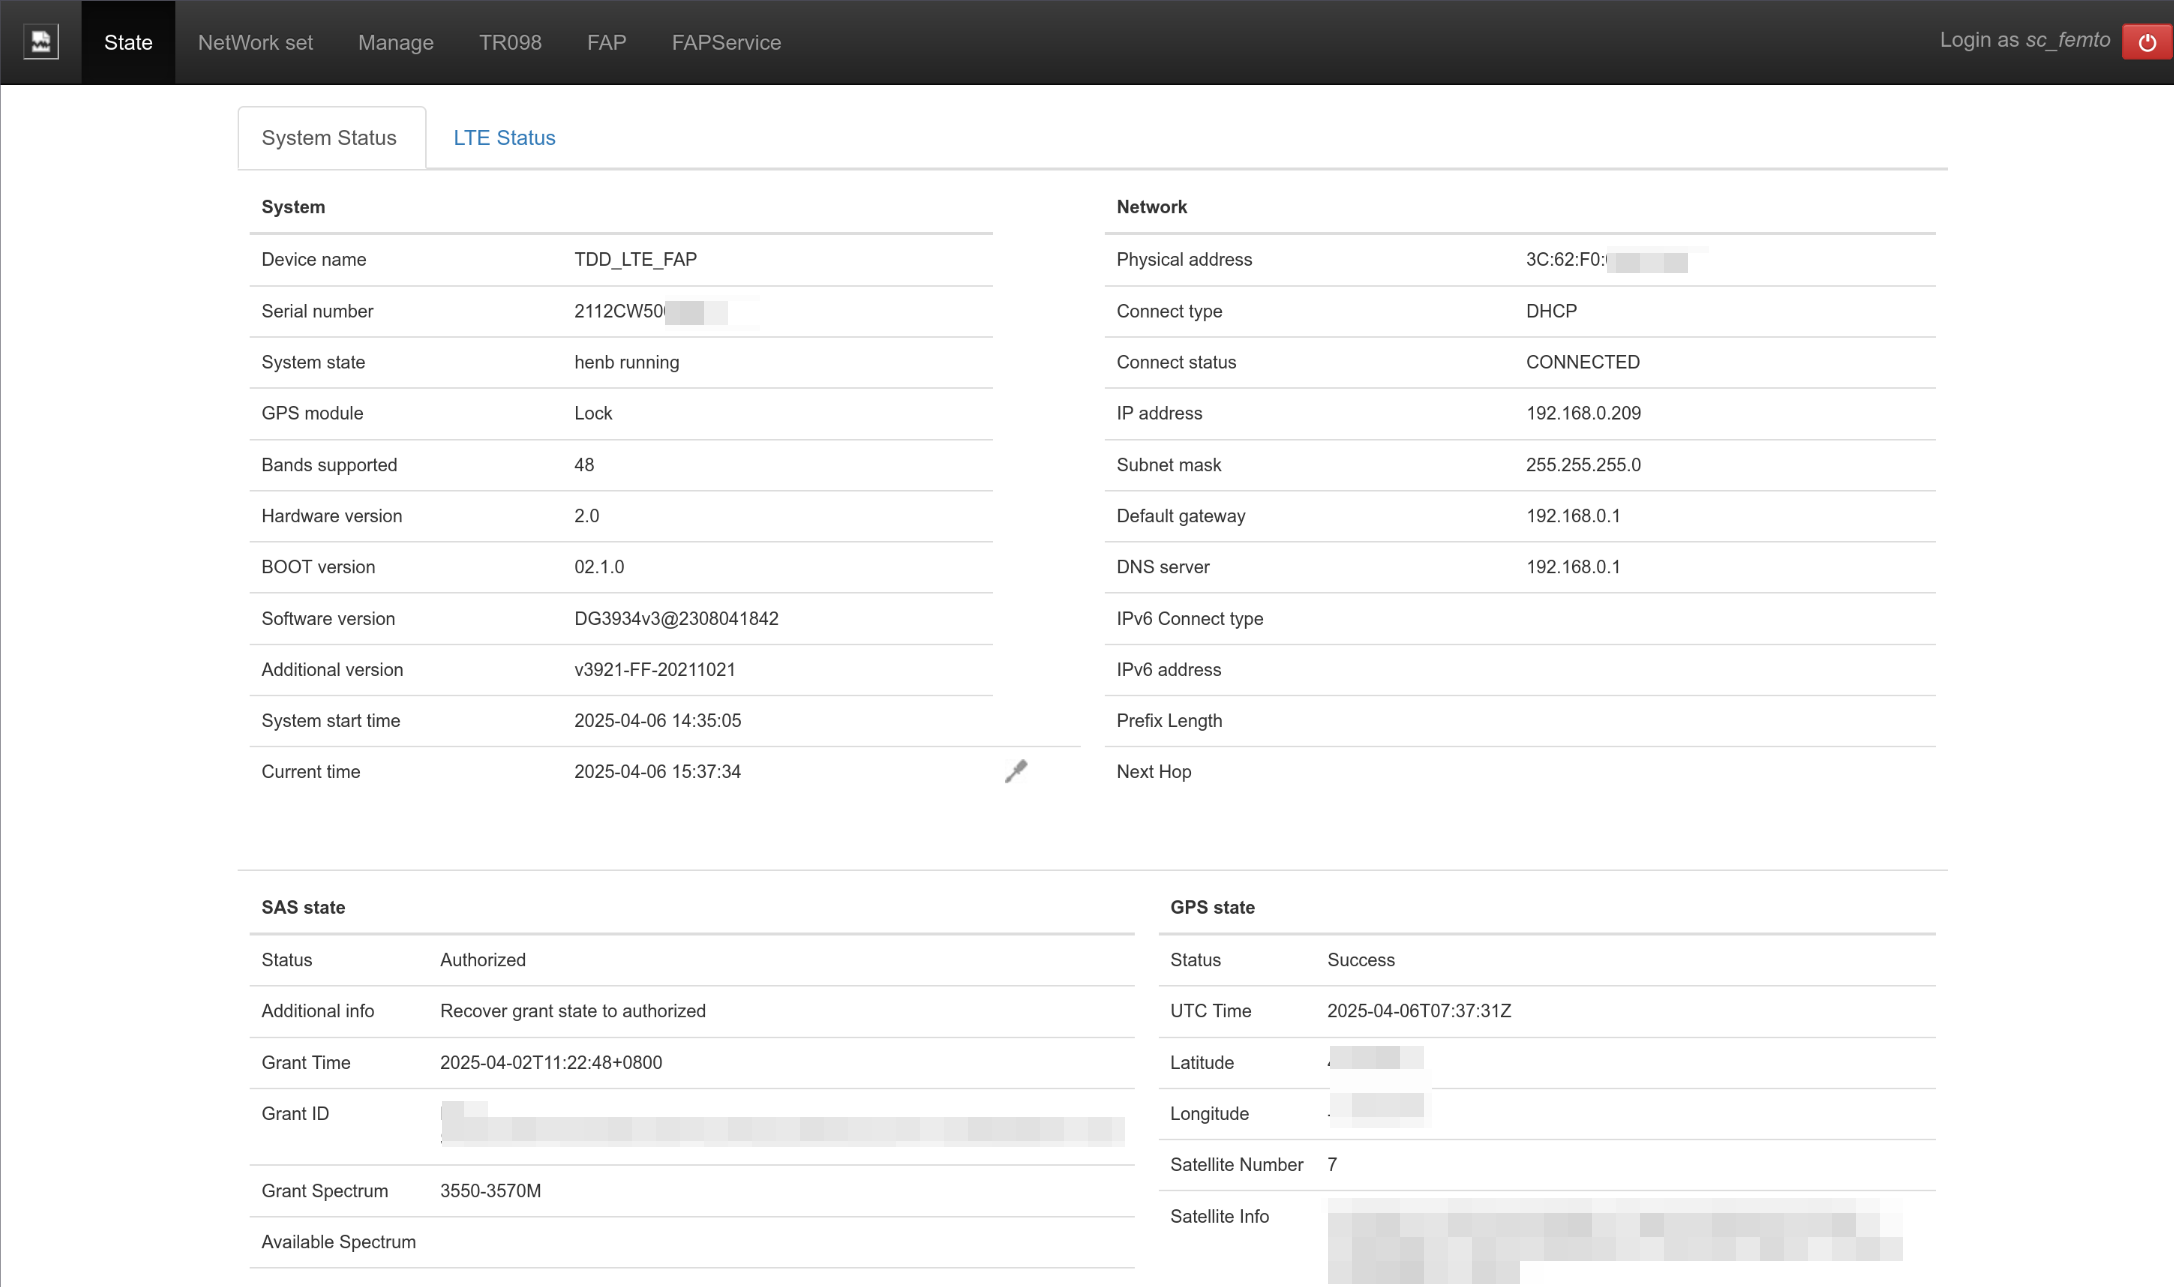
Switch to the Status tab to view the device status; you should see the base station status as Authorized and the corresponding frequency allocation.
At this point, check the base station's indicator lights; the leftmost LTE status indicator light should be a steady blue, indicating that it's now transmitting LTE signals. This completes the base station configuration.
Take out your phone, select any SIM card, turn off the "Automatic Network Selection" option, and the phone will automatically search for nearby mobile networks. If your phone supports LTE band 48, you should see a network named 315010, which is the signal transmitted by your base station.
Writing SIM Cards
With the LTE network in place, the next step is to write your network's authentication information onto the SIM cards, allowing phones to connect to your network.
When I bought the programmable SIM cards, the seller provided Windows card-writing software compatible with these SIM cards. I tried using pySim to write the cards on Linux, but the resulting SIM cards couldn't connect to the network for authentication, so I used Windows for this step.
Insert the SIM card writer into your computer and insert a programmable SIM card into the writer.
Open the card-writing software, first click the Read Card button in the top right to attempt to read the card's information, ensuring the writer is connected properly.
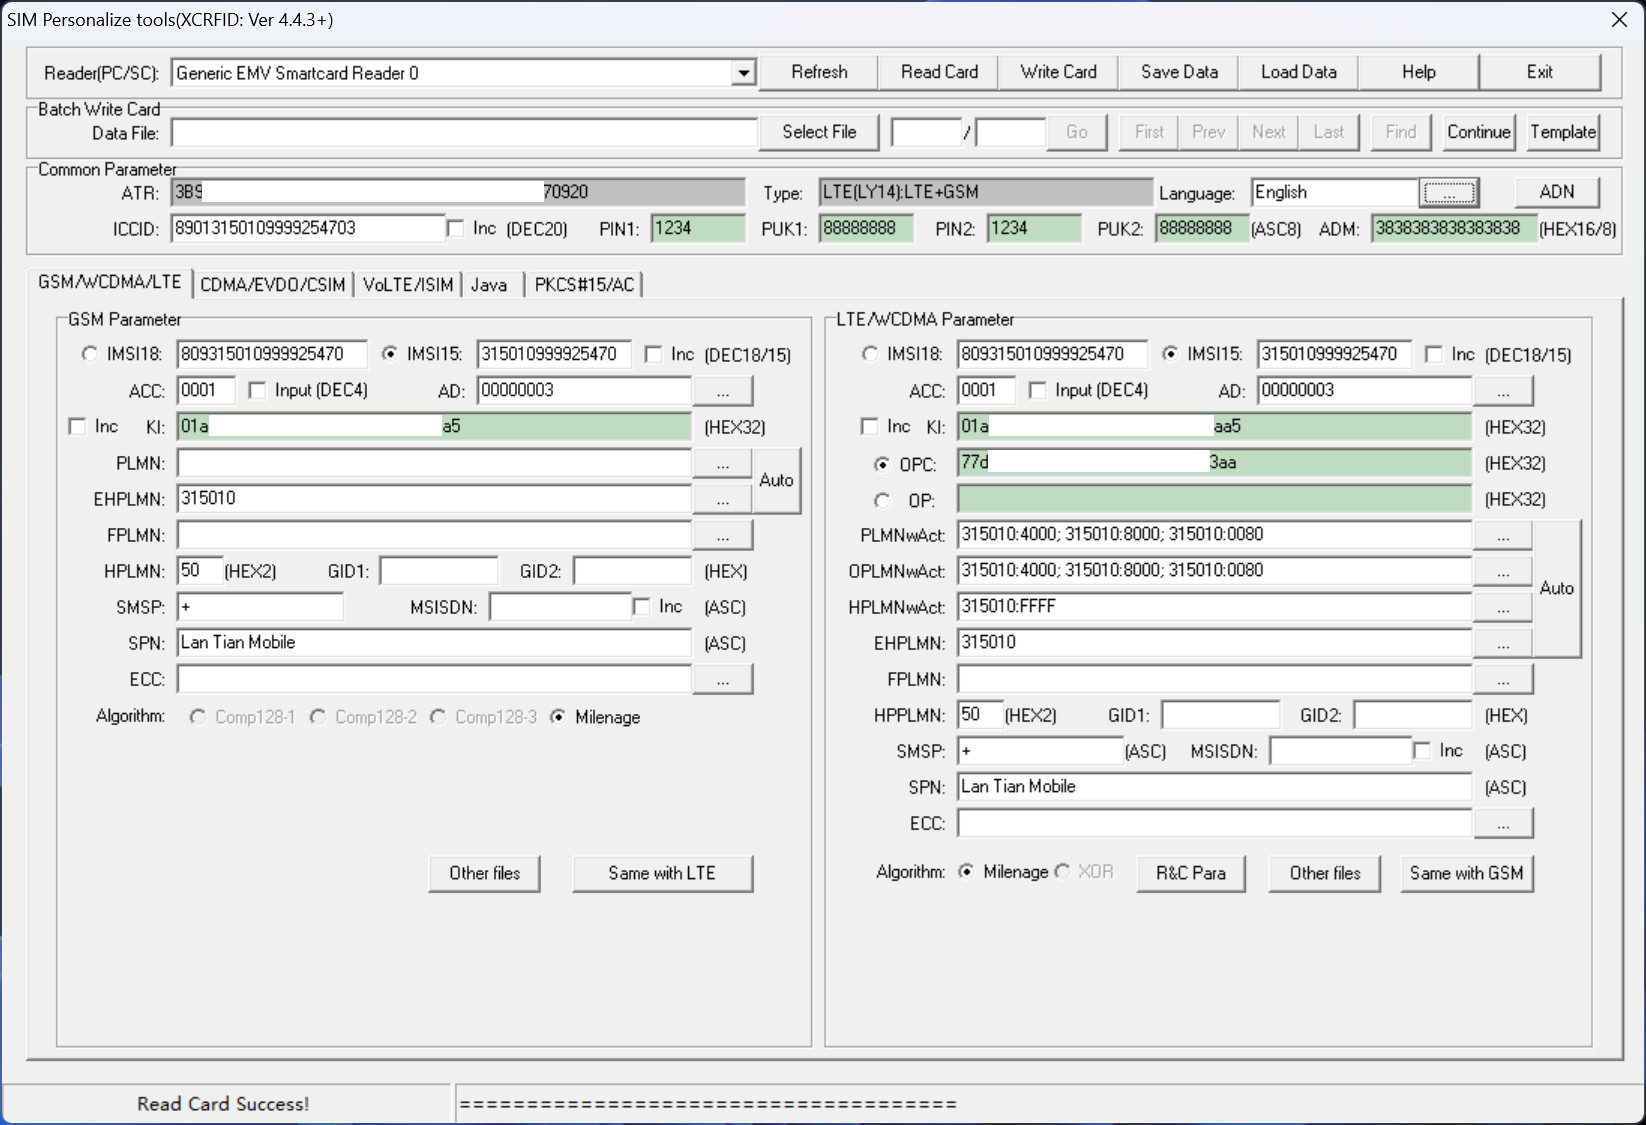
Then, in the LTE/WCDMA Parameter section on the right, enter the following information:
- Select
IMSI15and enter3150109999XXXXX, where the first ten digits are fixed, and the last five can be numbered arbitrarily.- The first six digits
315010are the MCC/MNC for CBRS networks. - The next four digits
9999are the IBN (IMSI Block Number) within the CBRS network;9999is the test number reserved for CBRS. The complete IBN allocation table can be found on the CBRS Assignments webpage. - The last five digits can be any number you choose.
- The first six digits
- Ensure the
ADfield value is00000003. If it's different, click the edit button on the right and ensure the MNC length is set to 3. - In the
KIandOPCfields, enter a random 32-character hexadecimal string for each. These strings are the authentication keys for the SIM card and cannot be read back once written to the SIM card.- Keep a backup of the
KIandOPCvalues; you'll need to enter them into the Magma core network management page later.
- Keep a backup of the
- Click the
Autobutton next toPLMNwAct, and the four input fields on the left should automatically fill with the values shown in the image. - Change the
SPNto the operator name you want to display on your phone, for example,Lan Tian Mobile.
Finally, click the Write Card button in the top right to write the card.
If you want to write multiple SIM cards, follow the same process, but ensure that the IMSI15, KI, and OPC values are different for each card.
Creating a Data Plan
Return to the core network management interface at https://magma-test.magma.test (or magma-test.[your own domain]), go to the left Traffic tab, then to the top APNs tab, and click Create New APN to create an APN.
- Enter
internetforAPN ID. - For
Max Required Bandwidth, enter1000000000(1 Gbps, far exceeding the speed LTE can provide) for both upload and download. - Select
IPV4V6forPDN Type. - Keep all other configurations at their defaults.

Then, click the top Data Plans tab and click Create New Data Plan.
- You can enter any value for
Data Plan ID. - Keep both
DownloadandUploadset toUnlimited.
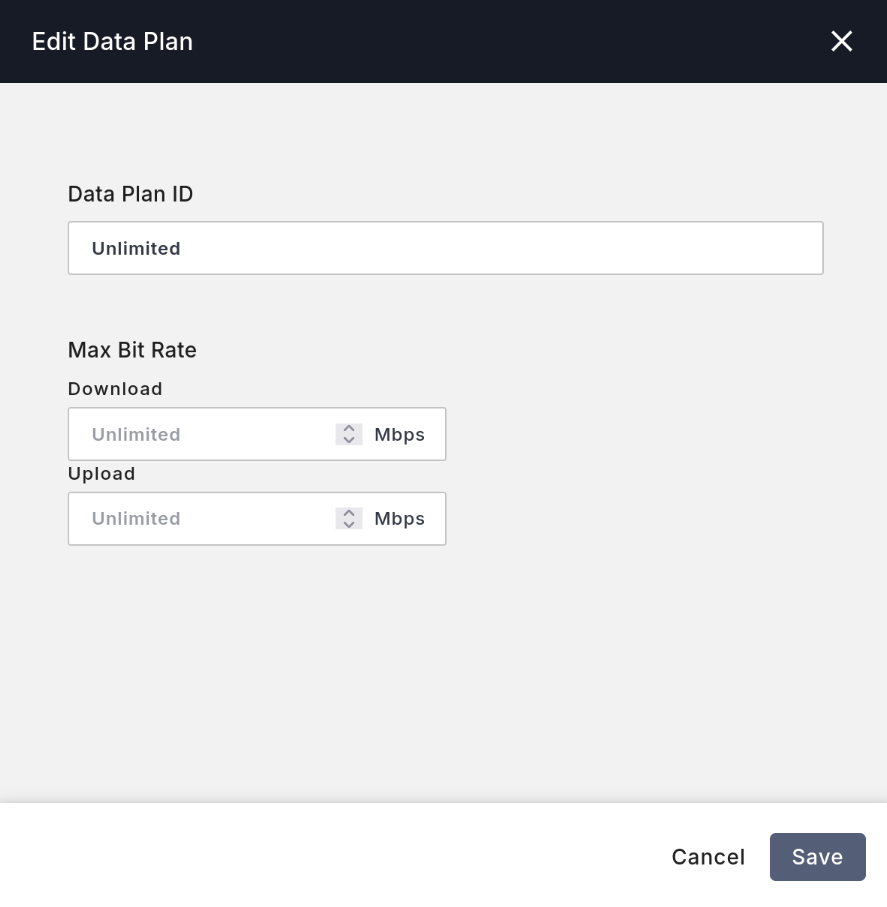
At this point, the data plan is created, and you can start registering SIM cards.
Registering SIM Cards
Go to the left Subscriber tab in the management interface, then click Manage Subscribers - Add Subscribers.
For each SIM card you want to add, click the Add New Row button in the top right and enter the SIM card's information:
- In the
IMSIfield, first enterIMSI, then theIMSI15you used when writing the card. For example:IMSI315010999925470. - You can enter any value for
Subscriber Name. - Enter the
KIyou used when writing the card in theAuth Keyfield. - Enter the
OPCyou used when writing the card in theAuth OPCfield. - Select
ACTIVEforServiceto enable the SIM card. - Select the data plan you created earlier for
Data Plan. - Select the APN you created earlier for
Active APNs. - Click the checkmark on the right to save.
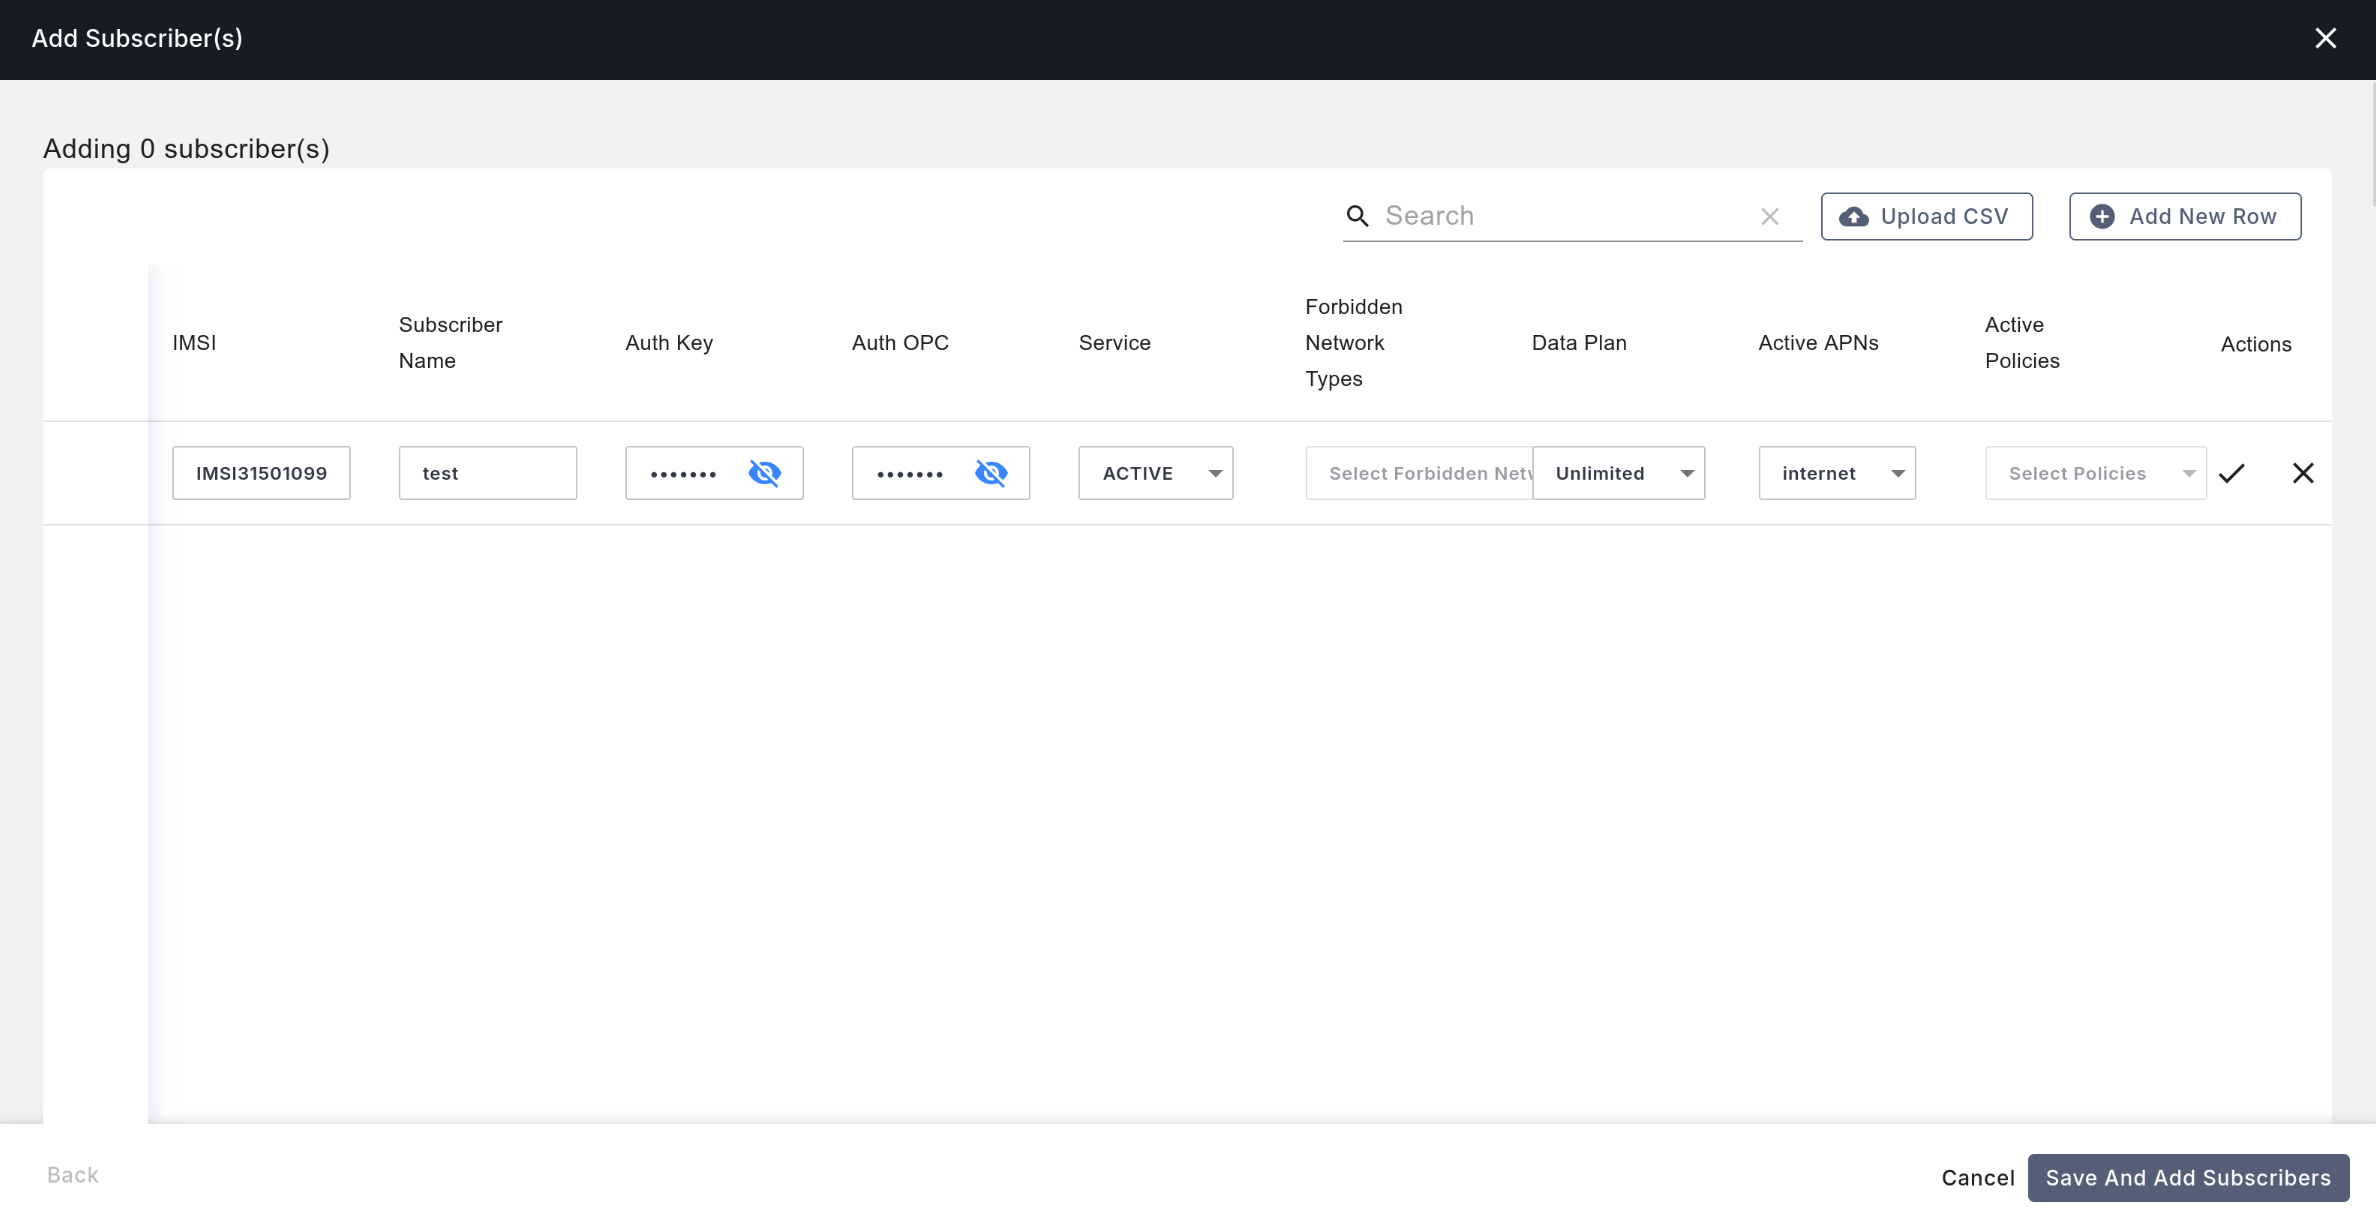
At this point, your SIM card is successfully registered with the Magma core network, and after a brief data synchronization, it will be ready for use.
Connecting a Phone to the Network
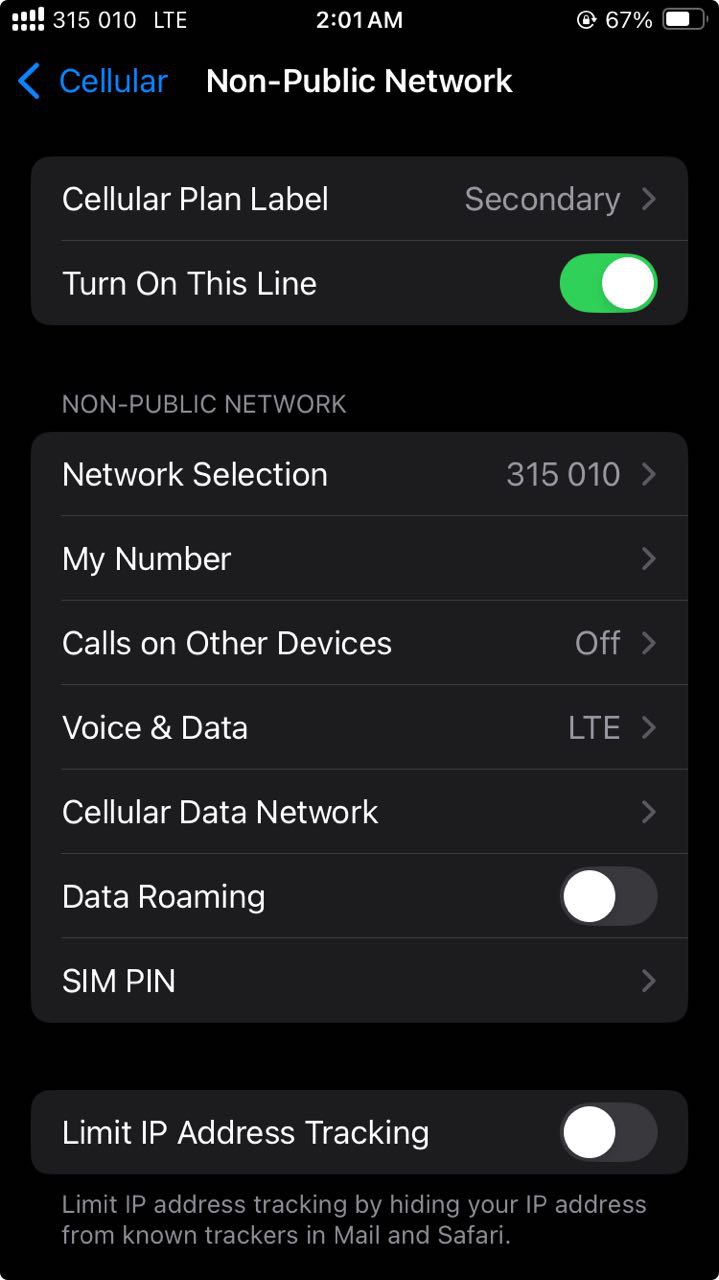
Insert the SIM card into your phone. I used an iPhone SE 2022 for testing.
After inserting the SIM card and waiting a moment, the iPhone connected to my base station, showing full signal strength in the top left corner, with the network displayed as 315 010, which is the MCC/MNC for CBRS:
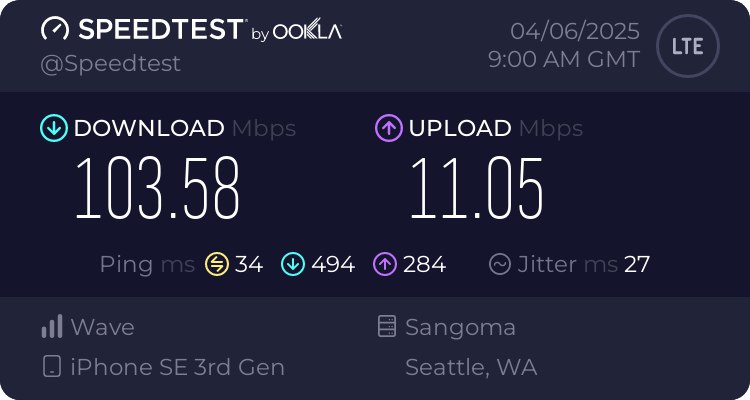
Using Speedtest to measure the speed, I achieved a download speed of 100 Mbps and an upload speed of 10 Mbps:
I also tried an Android phone, a Motorola Edge+ 2023. Although this phone could see my LTE network, it couldn't connect to it properly, even with the same SIM card that worked on the iPhone. Further investigation is needed.
Conclusion
The total cost of all the equipment and services I used to build this LTE network (excluding sales tax) is as follows:
- Proxmox VE host for running virtual machines, my existing equipment: $0
- FreedomFi/Sercomm indoor base station: $49 + shipping $12.3 = $61.3
- Programmable SIM cards and card writer: $38.99
- Google SAS: $2.64/month, calculated for one month
- Total cost: $102.93
This price is not expensive for a Homelabber, far below the traditional belief that building an LTE network costs hundreds or thousands of dollars, and all the equipment and services can be easily purchased.