AlphaRacks 是一个物美价廉的主机商,1CPU、512M内存、10G硬盘的 VPS 只要 9.9 美元/ 年。但是这家主机商在 IPv6 地址上比较抠,需要用户说明用 IPv6 的理由,据说最多给20 个?但是不一定给满20个,比如我告诉主机商要用 IPv6 地址给仅支持 IPv6 的用户提供服务,主机商回复:
我们已经为你的 VPS 增加了1个IPv6地址。
一个 IPv6 自然是不够我折腾的。好在美国 Hurricane Electric 公司提供 IPv6 隧道服务,为每个用户提供5个隧道,每个隧道有1个 /64地址池,并可以一键开通1个/48地址池。
如此良心的服务,要在 OpenVZ 的 VPS 上使用却还要费一番周折。因为 OpenVZ 的内核版本往往是2.6.32,2.6.32的老内核不原生支持隧道功能,而支持的新版3.10的内核刚刚发布,很多主机商没有更新。
在 OpenVZ 上开启 HE 隧道
我们需要借助一个第三方小程序,它可以把 Hurricane Electric 的隧道转换为 Tun/Tap 的隧道(相当于 Windows 下 OpenVPN 的那个网络适配器)并且在服务器上配置好。下载安装教程如下:
apt-get install iproute gcc
wget http://tb-tun.googlecode.com/files/tb-tun_r18.tar.gz
tar -xf tb-tun_r18.tar.gz
gcc tb_userspace.c -l pthread -o tb_userspace
mv tb_userspace /usr/bin/tb_userspace
然后创建 /etc/init.d/ipv6tb,输入下面这个从https://www.cybermilitia.net/2013/07/22/ipv6-tunnel-on-openvz/弄来的启动代码:
(注意替换其中的 IP 地址)
touch /etc/init.d/ipv6tb
chmod +x /etc/init.d/ipv6tb
nano /etc/init.d/ipv6tb
#!/bin/sh
case "$1" in
start)
echo "Starting ipv6tb"
setsid /usr/bin/tb_userspace tb [HE 隧道服务器的 IPv4 地址] [你 VPS 的 IPv4 地址] sit > /dev/null 2>&1 &
sleep 1s
ifconfig tb up
ifconfig tb inet6 add [你的 HE 隧道的客户端 IPv6 地址]/128
ifconfig tb inet6 add [分配给你的/64 地址池]::1/64
ifconfig tb inet6 add [分配给你的/48 地址池,没有就把这行删掉]::1/48
ifconfig tb mtu 1480
route -A inet6 add ::/0 dev tb
route -A inet6 del ::/0 dev venet0
;;
stop)
echo "Stopping ipv6tb"
ifconfig tb down
route -A inet6 del ::/0 dev tb
killall tb_userspace
;;
*)
echo "Usage: /etc/init.d/ipv6tb {start|stop}"
exit 1
;;
esac
exit 0然后输入:
/etc/init.d/ipv6tb start隧道就起来了。但是这时你会发现两个问题:
-
虽然你有一整个/64(可能还有个/48),但是你只能使用末尾是::1的地址;
-
VPS 原生的 IPv6 不通了,所有流量走了隧道。
接下来我们就要一步步解决这个问题。
开启整个地址池
Linux 内核支持一个叫 AnyIP 的功能。这个功能允许你将一整个地址池快速地设置到一个网络接口上,这样就不需要你手动给网络接口把地址池里的 IP 挂上去,或者写个脚本帮你挂。
顺带提一句,一个/64地址池有 18,446,744,073,709,551,616 个 IP。
那么如何开启这个功能呢?输入以下代码即可:
ip -6 route add local [分配给你的/64 地址池]/64 dev lo
ip -6 route add local [分配给你的/48 地址池,没有就把这行删掉]/48 dev lo
输完回车,你的地址池里其它的 IP 就全部可用了。
同时使用原生 IPv6 和隧道
当你的 VPS 上同时有多种 IPv6 接入方式时,你会发现你同时只能使用一个。因为 Linux 在非默认网络接口上接收到数据包后,会从默认的那个接口回复,而不是原路返回。
幸亏 Linux 提供策略路由功能,也就是根据一定条件,让各个数据包走到它们该走的接口上。
如何配置?按照步骤操作即可:
- 输入如下命令,设置路由表并关闭之前建立的隧道:
echo 200 ipv6tb >> /etc/iproute2/rt_tables
/etc/init.d/ipv6tb stop- 修改你前面创建的 /etc/init.d/ipv6tb,删除所有内容,用如下内容代替:
(下面的代码修改自 http://itkia.com/ipv6-policy-routing-linux-gotchas/)
#! /bin/sh
touch /var/lock/ipv6tb
case "$1" in
    start)
        setsid /usr/bin/tb_userspace tb [HE 隧道服务器的 IPv4 地址] [你 VPS 的 IPv4 地址] sit > /dev/null 2>&1 &
        sleep 1s
        # bring up the tunnel interface & set mtu
        ifconfig tb up
        ifconfig tb mtu 1480
        # hack: show ip in ifconfig
        ifconfig tb inet6 add [你的 HE 隧道的客户端 IPv6 地址]/128
        ifconfig tb inet6 add [分配给你的/64 地址池]::1/64
        ifconfig tb inet6 add [分配给你的/48 地址池,没有就把这行删掉]::1/48
        # make use of the whole ipv6 block
        ip -6 route add local [你的 VPS 的原生 IPv6 地址]/128 dev lo
        ip -6 route add local [你的 HE 隧道的客户端 IPv6 地址]/128 dev lo
        ip -6 route add local [分配给你的/64 地址池]/64 dev lo
        ip -6 route add local [分配给你的/48 地址池,没有就把这行删掉]/48 dev lo
        # nullroute native ipv6 to prevent sending via wrong interface
        ip -6 route add unreachable [你的 VPS 的原生 IPv6 地址]/128
        # nullroute ipv6 tunnel to prevent sending via wrong interface
        ip -6 route add unreachable [你的 HE 隧道的客户端 IPv6 地址]/128
        ip -6 route add unreachable [分配给你的/64 地址池]/64
        ip -6 route add unreachable [分配给你的/48 地址池,没有就把这行删掉]/48
        # flush route table & route the interfaces
        ip -6 route flush table ipv6tb
        ip -6 route add 2000::/3 dev venet0 src [你的 VPS 的原生 IPv6 地址]
        ip -6 route add 2000::/3 dev tb src [你的 HE 隧道的客户端 IPv6 地址] table ipv6tb
        # flush rule table
        ip -6 rule flush
        # restore routing in ipv6 tunnel address block
        ip -6 rule add priority 200 to [你的 HE 隧道的客户端 IPv6 地址]/128 table main
        ip -6 rule add priority 201 to [分配给你的/64 地址池]/64 table main
        ip -6 rule add priority 202 to [分配给你的/48 地址池,没有就把这行删掉]/48 table main
        # restore routing in native ipv6 address block
        ip -6 rule add priority 210 to [你的 VPS 的原生 IPv6 地址]/128 table main
        # restore routing to reserved ipv6 range
        ip -6 rule add priority 1000 to 2001:db8::/32 table main
        # route packets from tunnel back to the tunnel
        ip -6 rule add priority 30000 from [你的 HE 隧道的客户端 IPv6 地址]/128 to 2000::/3 table ipv6tb
        ip -6 rule add priority 30001 from [分配给你的/64 地址池]/64 to 2000::/3 table ipv6tb
        ip -6 rule add priority 30002 from [分配给你的/48 地址池,没有就把这行删掉]/48 to 2000::/3 table ipv6tb
        # restore ipv6 main route & flush cache
        ip -6 rule add priority 32766 from all table main
        ip -6 route flush cache
    ;;
    stop)
        ifconfig tb down
        # restore rule table
        ip -6 rule flush
        ip -6 rule add priority 32766 from all table main
        pkill -9 tb_userspace
    ;;
    *)
        echo "Usage: /etc/init.d/ipv6tb {start|stop}"
        exit 1
        ;;
esac
exit 0- 输入如下命令重新开启隧道:
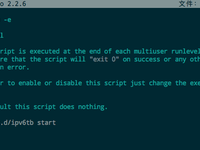
/etc/init.d/ipv6tb start- (可选)开机自动启动:打开
/etc/rc.local,在exit 0之前建立一行,输入:
/etc/init.d/ipv6tb start当你改完后,文件应该是这样的:
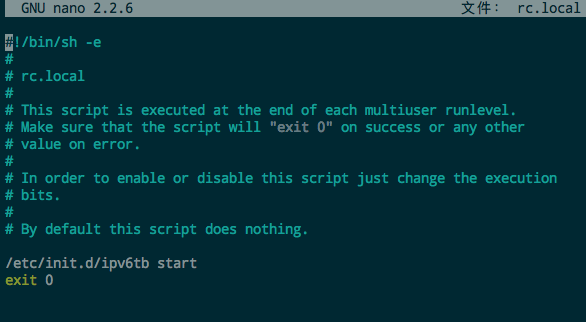
保存后,隧道就能自动启动了。
这样设置出来的 IPv6 隧道,可以与原生 IPv6 和平共处,同时系统发起的网络操作(比如软件更新)都会经过原生 IPv6 而不走隧道,大大提高了稳定性与速度。